Turning the modules on
Bookings and Events and tickets are activity modules of your shop. If you did not choose them when opening the shop, turn them on from the Settings → Activities tab. Each then gets its own section in the left menu.
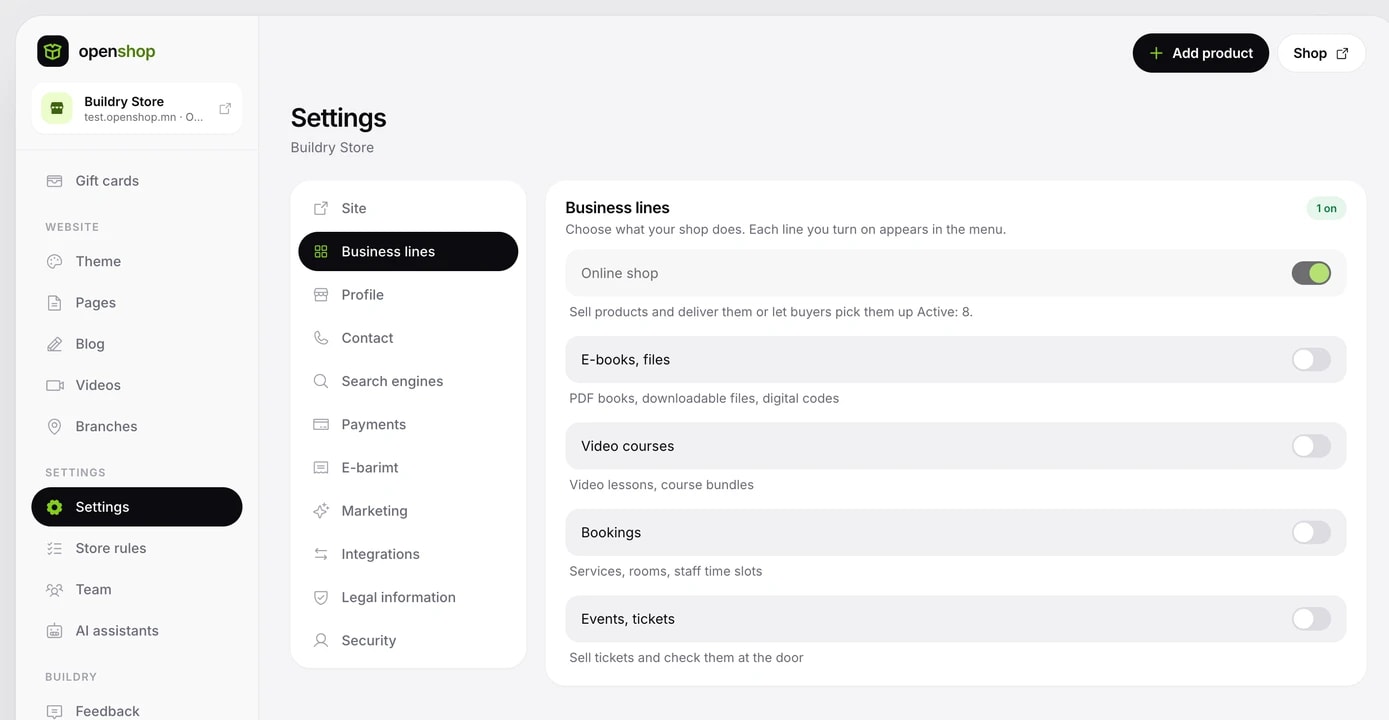
- In Bookings: Schedule (incoming bookings), Resources (services, rooms, halls), Services (services that staff provide) and Staff.
- In Events: Events.
- Buyers pick a time and book on your shop's /book page.
Resources: services, rooms, halls
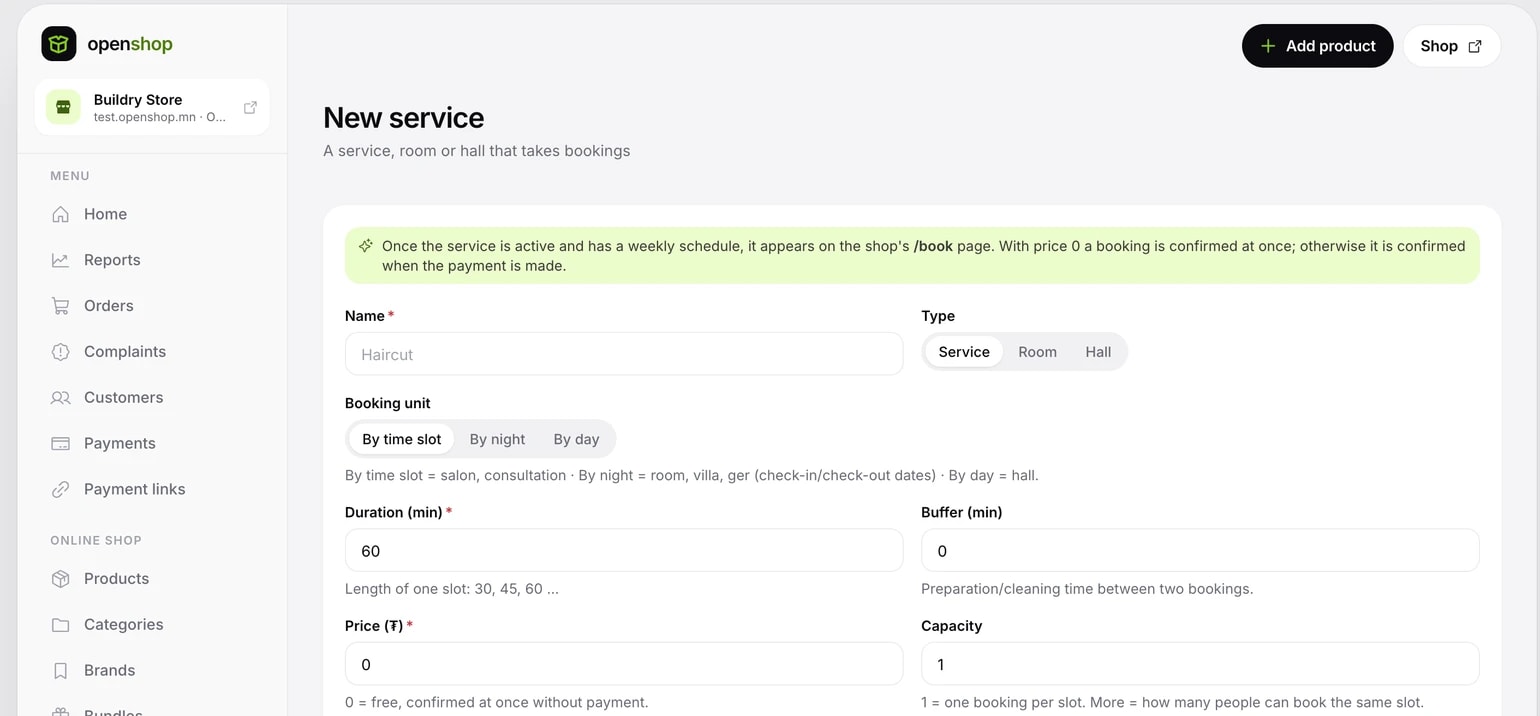
- In Bookings → Resources, click + New service.
- Write a name and choose the Type (Service, Room, Hall).
- Choose the booking unit: By the hour (salons, consultations), By the night (rooms, villas, gers) or By the day (halls).
- Set the Online deposit (%): 100 means full payment, 30 takes 30 percent online and the rest on site, 0 means no online payment.
- Choose your cancellation terms and, if you like, write an Additional note (see the section below).
- Add photos (up to 10, the first is the main one) and a Description, and set the Status switch to Active.
- Set the opening and closing time for each day under Open days or Weekly schedule, then click Create.
- By the hour: Duration (5 to 1440 minutes), the Break between bookings, Price (₮) and Capacity (how many bookings per slot). Slots are created one after another from the opening time by duration and break.
- By the night and by the day: Check-in and Check-out times (opening and closing times for daily bookings), the price per night or day, the Number of identical units (for example 5 identical gers), the minimum and maximum stay (up to 90), how many days ahead people can book, and the maximum number of guests.
- With a price of 0, the booking is confirmed at once. With a price, it is confirmed as soon as the payment is made.
After saving, more sections appear on the resource page. For nightly and daily resources, add different prices under Prices with + Weekend, + Season and + Specific date, then click Save prices. Close days for repairs or other reasons under Closed days.
Staff and services
- In Bookings → Staff, click + New staff.
- Set the name, photo, Online deposit (%), cancellation terms and working hours, then click Create.
- In Bookings → Services, click + New service.
- Write the Name, Price (₮), Duration (min), Break (min) and Time step (min). With a time step of 15, start times appear as 10:00, 10:15 and so on.
- Under Who provides it, choose the staff who offer the service. You can set a different price for each person; if empty, the service price applies.
- Add a photo and Description, then click Create.
If the customer chooses a staff member or Anyone, the booking goes to the least busy person at that time. One staff member takes one customer at a time, so they are never double-booked, even across different services. Start times come from the chosen staff's working hours, so a service with no staff assigned shows a No staff assigned badge in the list.
Deposits and cancellation terms
Your cancellation terms are a commitment you make to your customers. The terms you choose are shown to the customer with dates and times before they book. Everything is calculated on the deposit paid online.
- Ready-made presets: Flexible, Moderate, Strict and Final (nothing is returned).
- Custom: set yourself up to how many hours before the start a booking can be cancelled free (1 to 8760 hours), and what percentage of the deposit is returned for a later cancellation.
- Additional note: your own words shown under the terms. For example: Please call us to make changes.
Managing incoming bookings
The Bookings → Schedule page has two tabs: List and Calendar. When a customer picks a time, it is held for 15 minutes and released on its own if not paid. That way one time never goes to two people.
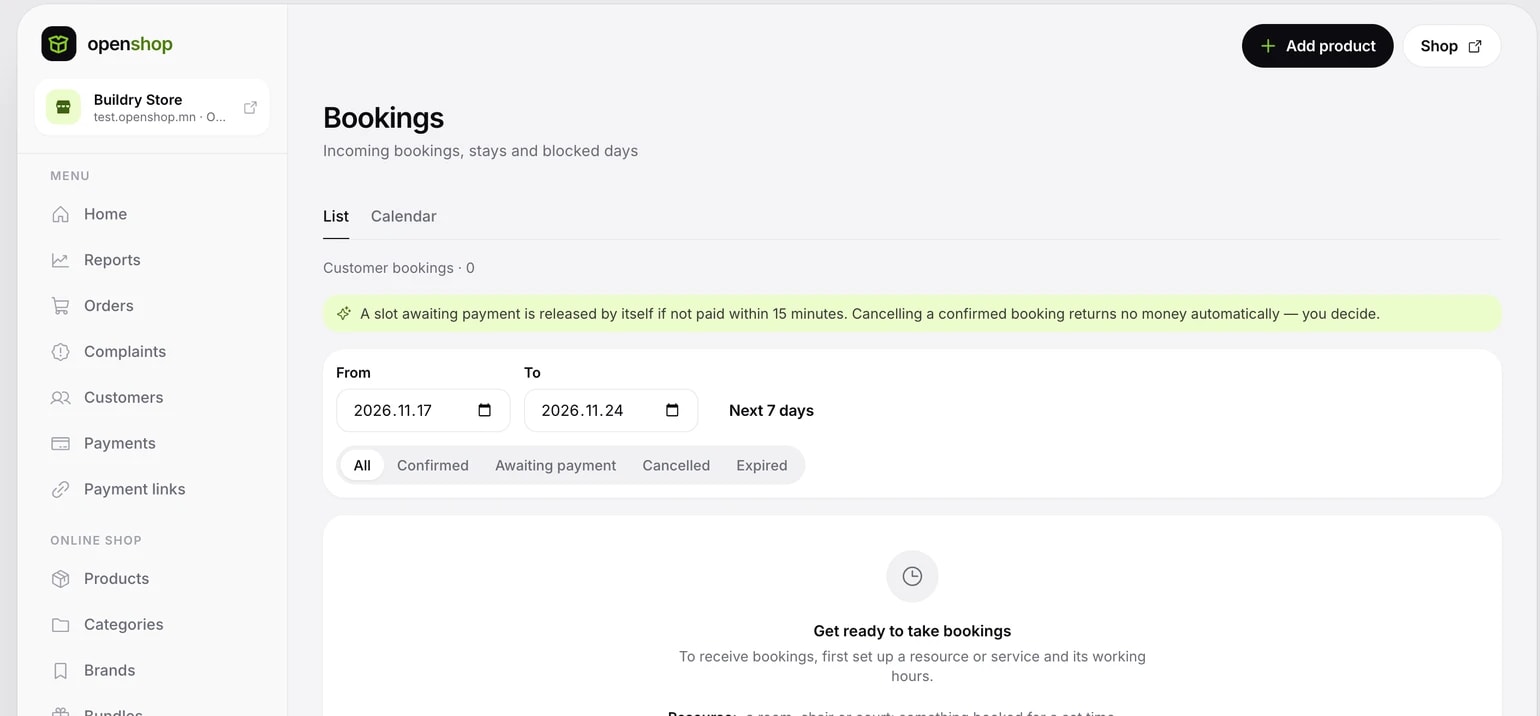
- List: filter by Start and End date or This week, and by status (Confirmed, Awaiting payment, Cancelled, Expired).
- Balance: if the rest of the deposit was paid on site, mark it Balance paid, or click Create balance link and send the link. When it is paid through the link, the balance marks itself as paid.
- Cancel: choose who asked to cancel (The shop (us) or The customer). If money was paid online, the Amount to return worked out from your terms is shown; once you have made the transfer, mark Return already made.
- If you make the transfer later, mark it with the Returned button in the list.
- To enter a booking taken by phone or on another site, open the Calendar tab.
- Click an empty cell in the resource's row.
- Choose Manual booking, write the Customer (required), Phone, Price (if empty, the service price) and Note, then click Add manual booking. Or choose Close to close the day.
Syncing calendars with Airbnb and Booking.com
The bottom of the resource page has two kinds of iCal connection.
- Under Calendar export (iCal), click Create link.
- Click Copy and add it in the calendar import section of Airbnb, Booking.com or Google Calendar. Your bookings show there as blocked days, without customer names or phone numbers.
- Under External calendar import (iCal), paste those sites' export link into the iCal link field, give it a name if you like and click Connect. Days booked there are blocked here automatically every 15 minutes. Connect up to 3 calendars.
Events and tickets
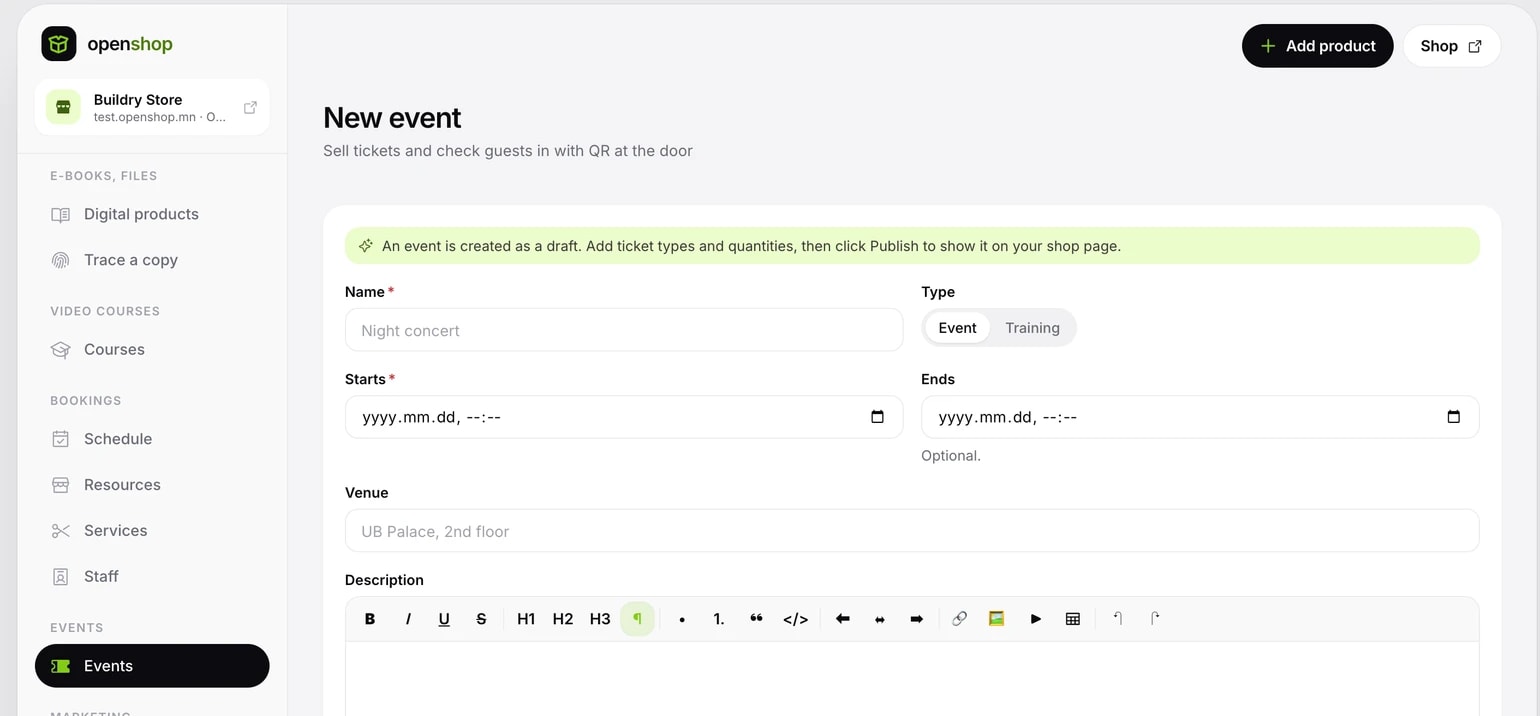
- In Events, click + New event.
- Write the Name, Type (Event or Training), Start date and time, End (optional), Location and Description, then click Create. The event is created as a draft first.
- Under Tickets, click + Add ticket type, write the Name, Price (₮), Quantity and the maximum per order, then click Save. Add each price tier as its own type.
- Click Publish and it appears on your shop's page. An event with no ticket types cannot be published.
- Quantity is a hard limit. When a buyer starts paying, their seat is held for 15 minutes and goes back on sale on its own if not paid.
- You cannot set a quantity lower than the tickets already sold.
- As soon as the payment is made, each ticket's QR code is emailed to the buyer if they left an email address.
- Under Attendees, see each ticket's holder, phone, type and status (Valid, Checked in, Awaiting payment).
- After the event, mark it with Finished. It no longer shows on your shop's page, but tickets already sold stay valid.
Door check-in
- Open your event and click Door check-in. A phone or tablet works best.
- Click Turn on camera and allow the browser to use the camera.
- Hold the guest's QR code up to the camera. The result shows at once.
- If the camera does not work, paste the ticket code or link into the Enter code by hand field and click Check.
Each ticket gets in only once. A second scan shows that it already checked in, and at what time. Recently scanned tickets are listed below.