Downloading the app and signing in
- Download the OpenShop Merchant app from the App Store: https://apps.apple.com/mn/app/openshop-merchant/id6830031265
- Open the app and swipe the Swipe to sign in button.
- The sign-in page opens on id.openshop.mn. Sign in with the account you use for the web console. Staff sign in on the Staff tab with their username and password.
- If you have several shops, choose one. You can switch later by tapping the shop name at the top left of the Home screen and using Switch shop.
- iPhone and iPad, iOS 17 or later.
- Without a shop, you can open one right in the app (see Opening a shop in the app below). A shop opened on the web (app.openshop.mn) also shows in the app with the same account.
- The app has five tabs: Home, Orders, Products, Reports and Promotions. Staff only see the tabs their permissions allow.
Opening a shop in the app
Sign in with an account that has no shop and the Let's open your shop screen appears; tap Open a shop to begin. If you already have a shop, tap the shop name on the Home screen and choose Open a new shop.
- Read and accept the terms of service.
- Verify your phone: tap Get a verification code, then Write message to send the prepared message. If your phone was verified before, it shows as verified.
- Tap Verify with DAN and confirm your citizen details once with the account you use for e-Mongolia.
- Choose what you sell. You can choose one or several.
- Enter the shop name and address (your-shop.openshop.mn). Read the tip under the address: choose a short (6 to 12 characters), clear address that is easy to type. A logo is optional.
- Choose a theme. Tap View to see a sample shop.
- Choose who runs the shop, then read and accept the contract. The contract is made online when the shop opens.
- The person opening a shop is a citizen of Mongolia verified with DAN. Staff accounts cannot open shops.
- In the app you can currently open a shop as an individual only. Switch to a company later in the console.
- The address cannot be changed later. The theme, logo and other settings can be changed any time.
The Home screen
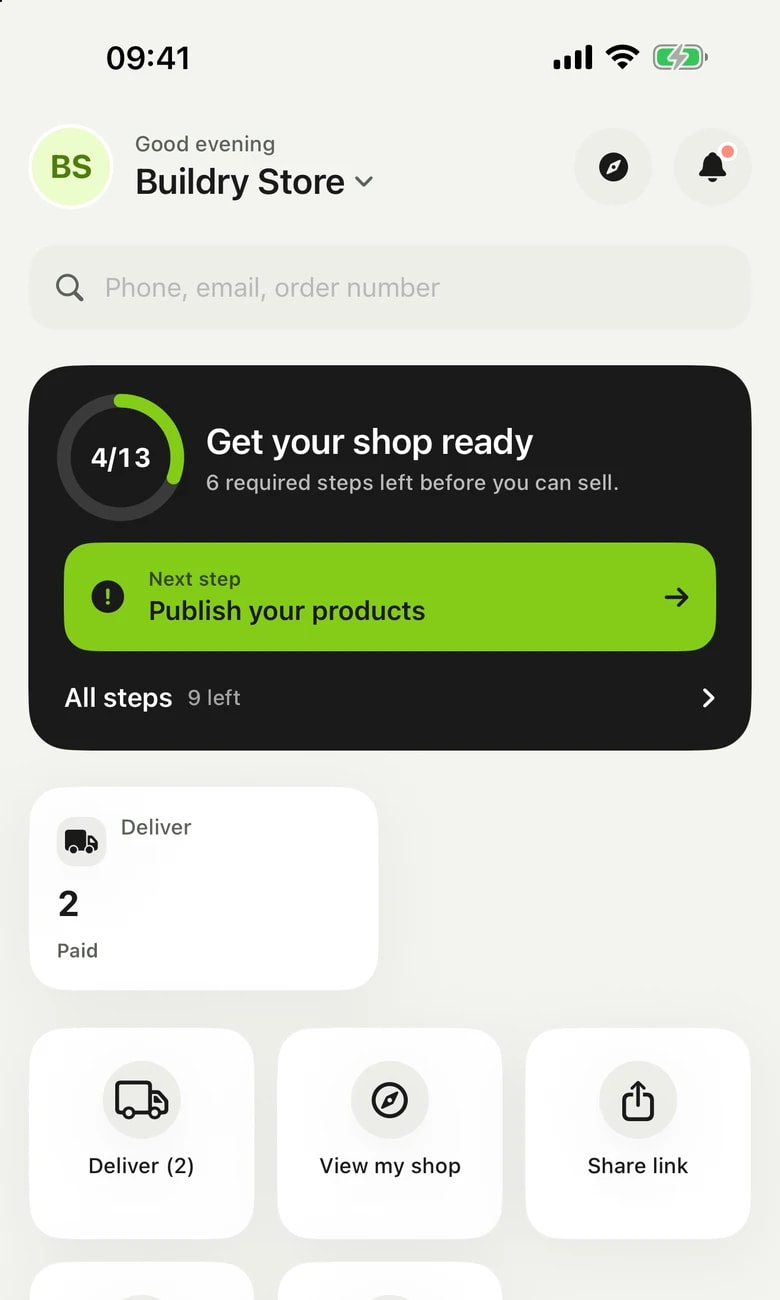
Until your shop is ready, a Get your shop ready card shows at the top of the Home screen: how many steps are done and what comes next. Tap the next step to open that setting directly, or tap All steps for the full list. Once setup is complete, the card is replaced by the next order to deliver.
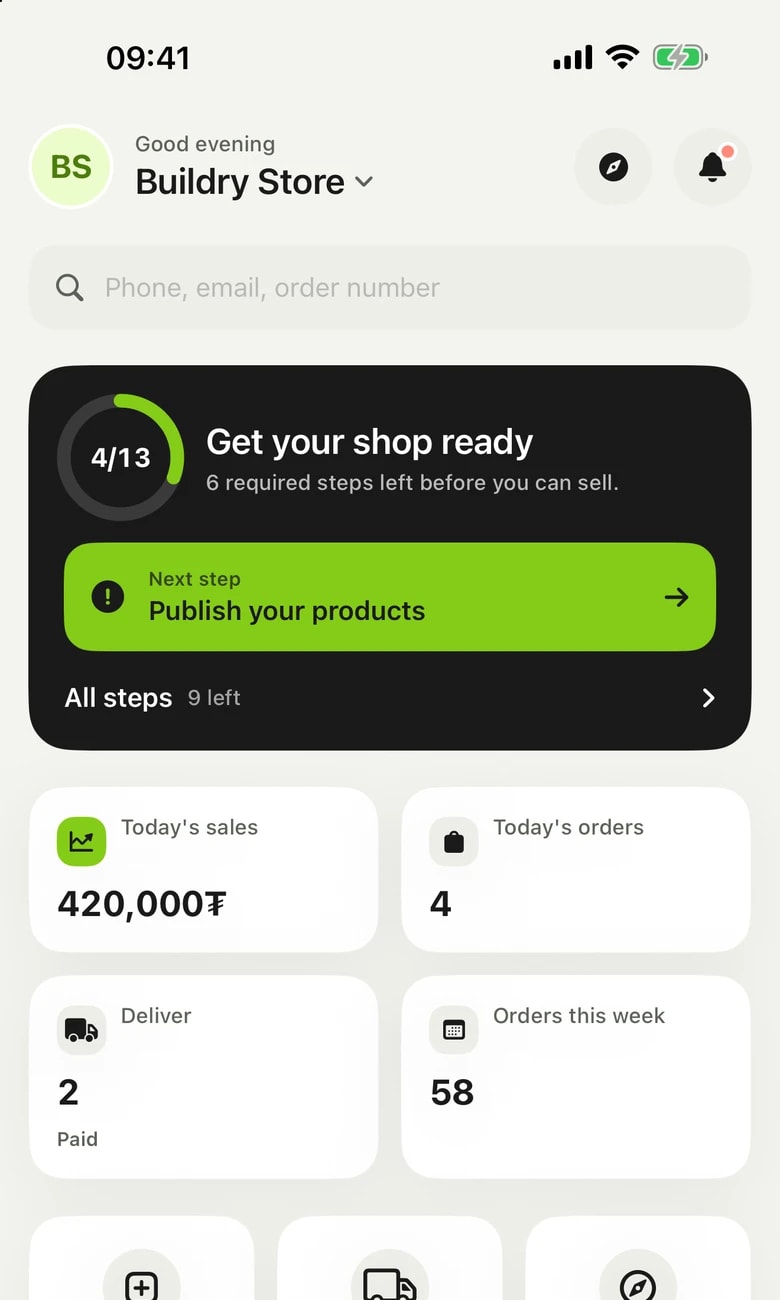
- Figures: today's sales, today's orders, orders to deliver and orders in the last 7 days. Tap To deliver to open the orders waiting for delivery.
- Quick actions: Add product, Deliver, View shop, Share link, Payments and All actions.
- Below them: orders needing attention (awaiting delivery), a 7-day chart and the latest orders.
- Search at the top for orders by phone, email or order number. The browser icon opens your shop in Safari; the bell icon opens orders to deliver.
- On iPad, Home shows in two columns.
Setup progress
Setup progress is the list of steps to take before you start selling. It is the same list as on the web console's home page.
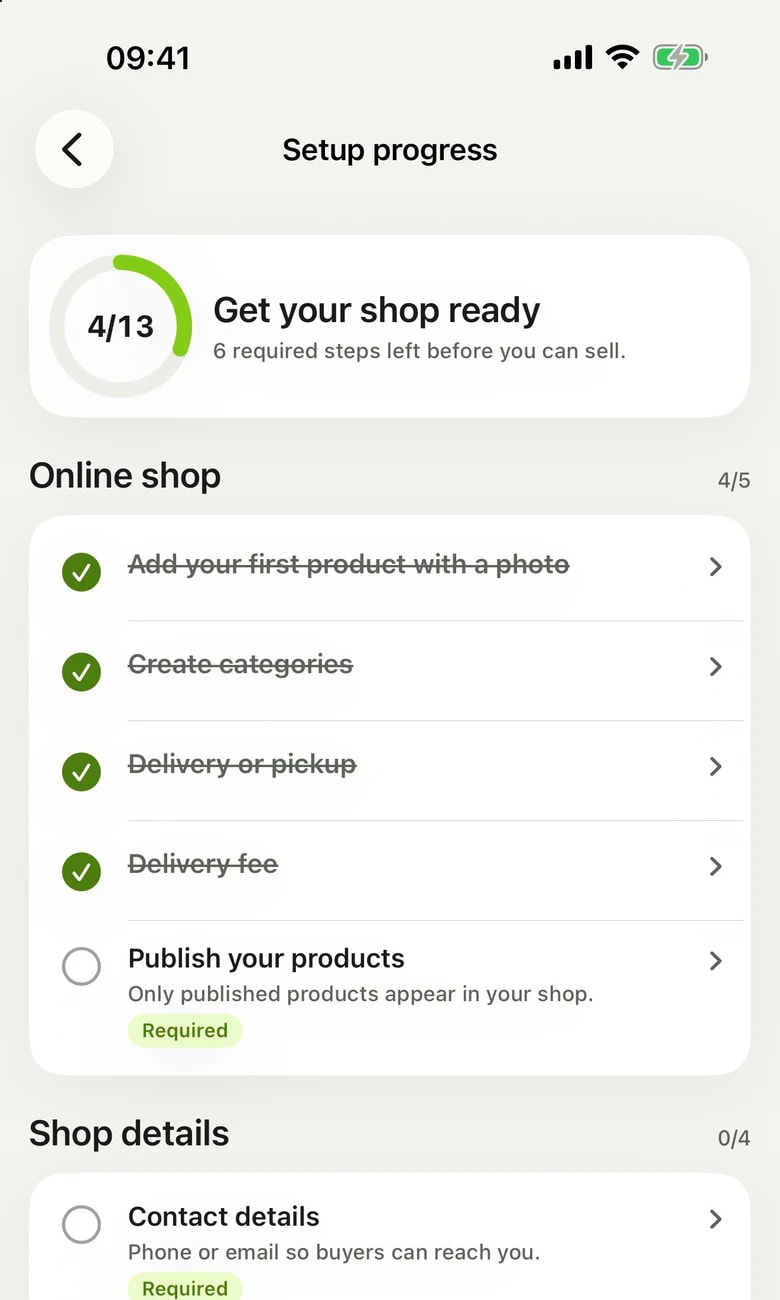
- Done steps are ticked; steps not done have an empty circle. Steps marked Required must be done before you start selling.
- Tap a step to open that setting in the app. Steps marked Web console open the console page inside the app.
- Pull the list down to refresh it.
Shop management: all actions
Every web console action is in the app. Tap All actions on the Home screen, or tap the shop name and choose Shop management.
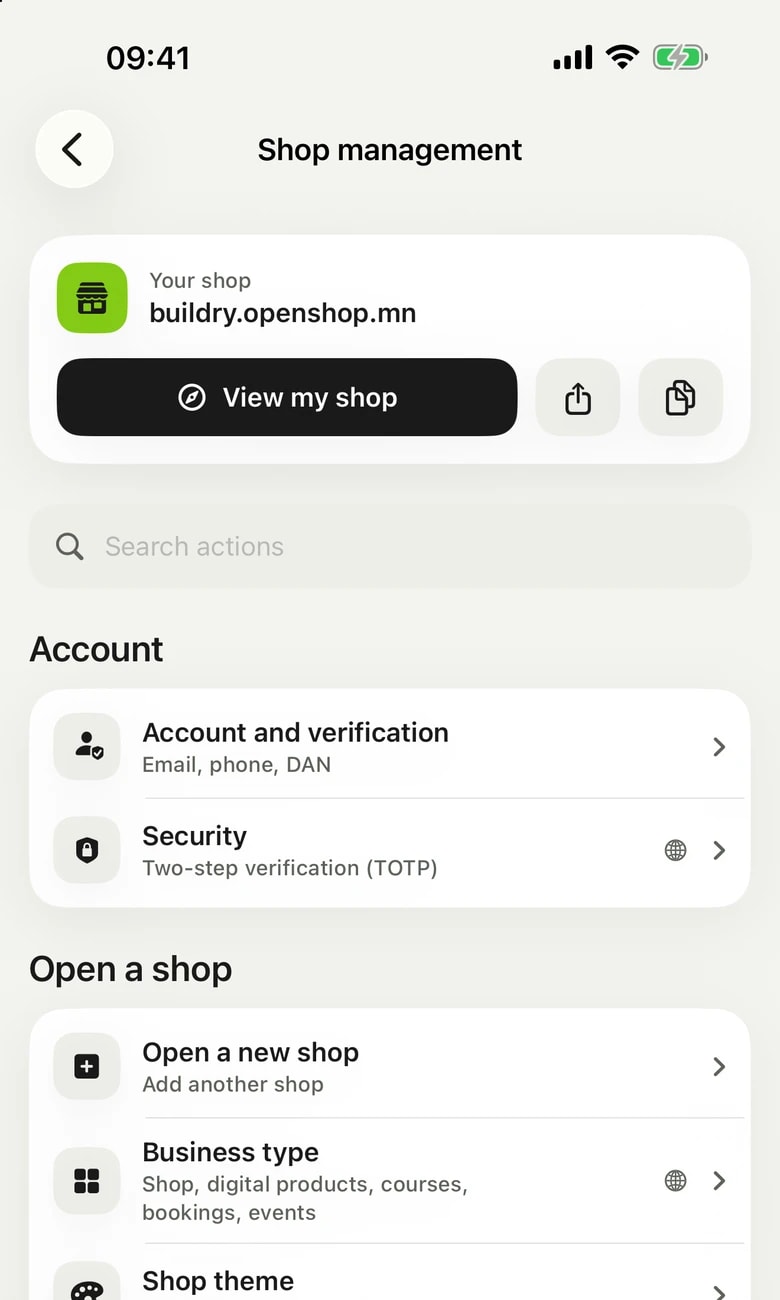
- Actions are grouped from opening a shop to after-sales: Account, Open a shop, Shop details, Catalog, Accepting payments, E-barimt, Publish and share, Orders and After the sale. With a module turned on, an Activities group is added.
- Search actions by name with the search field.
- Use the card at the top to open your shop in Safari, share its link or copy it.
- Rows with a globe icon open the web console page inside the app. The sign-in is shared, so there is no need to sign in again. The Safari button opens that page in Safari.
- Staff only see the rows their permissions allow.
Shop settings in the app
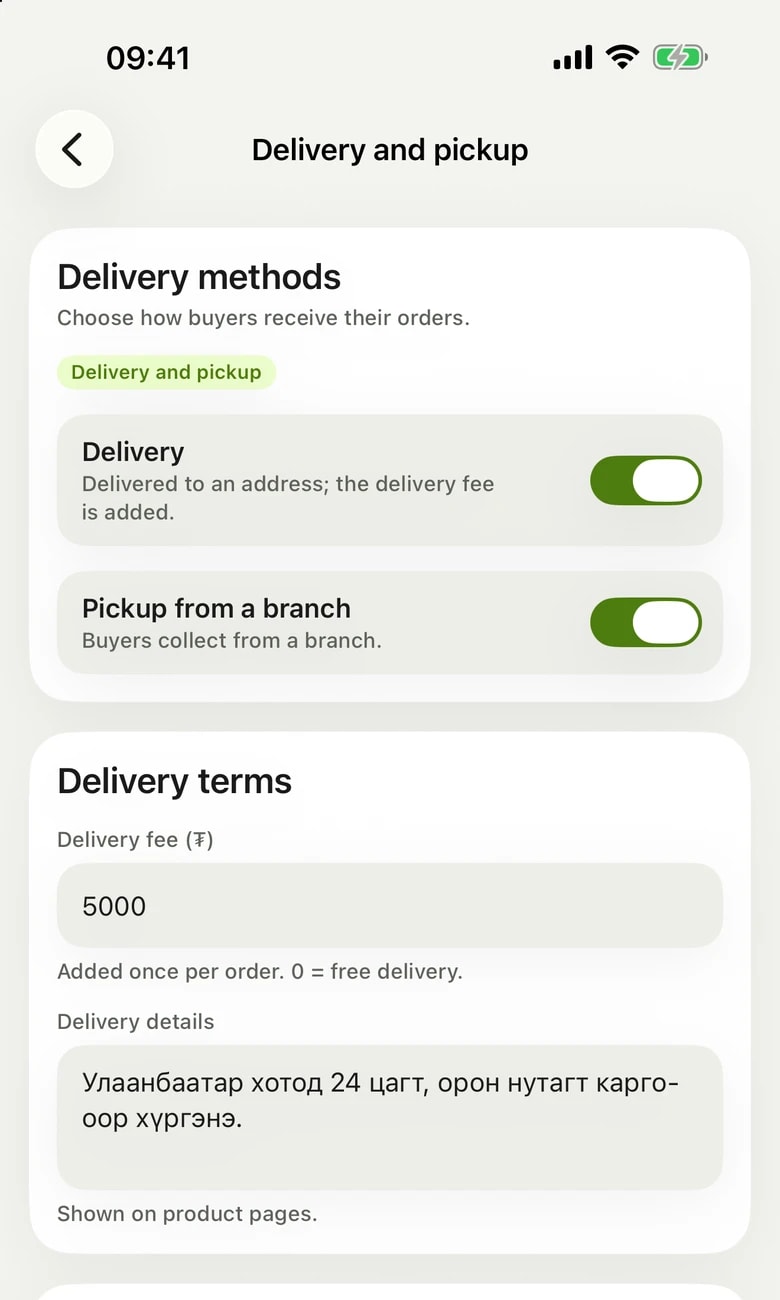
These pages in the Shop details and Catalog groups of Shop management open natively in the app. Each page has its own Save button and asks before you leave with unsaved changes.
- Logo and introduction: change the logo, site name, tagline and full description.
- Contact and opening hours: phone, email, address, Facebook, Instagram, TikTok and YouTube links, and the opening hours for each day of the week.
- Delivery and pickup: turn Delivery and Pickup from a branch on or off (you confirm before changing), plus the delivery fee and delivery note.
- Branches: the branch name, city or province, district or soum, address, phone and schedule. With Pickup point, Main branch and Show in shop options.
- Shop policies: the minimum order amount, the threshold above which delivery costs nothing, the low-stock display threshold, showing savings, the announcement bar at the top of the shop and the policy pages.
- Categories and Brands: add, rename, add subcategories and delete.
- In the app you write policy pages as plain text. Formatted text from the web console (descriptions, policies) is read-only in the app; edit it in the console.
- Other settings such as search engines, your own domain, home page design, modules and the legal entity open in the web console inside the app.
- People without permission to edit settings see You can only view this, and no Save button appears.
Notifications
As soon as an order is paid, a New paid order notification reaches your phone. Tap it to open that order directly. The notification goes to every member allowed to see the shop's orders.
- When the iPhone asks to allow notifications, tap Allow.
- If notifications do not arrive, tap the shop name on the Home screen. If notifications are off, a Turn on notifications row shows there.
- Or check that notifications are on under Settings, Notifications, OpenShop Merchant on your iPhone.
Besides order notifications, OpenShop may send news and tips about new features and guides. Turn these off in the Privacy section; order notifications are not affected.
Orders and delivery
The Orders tab lists your orders. Tap an order to open its details.
- Buyer: get in touch directly with the Call and Message buttons.
- Delivery address: copy it with Copy and see the location with Map.
- Each product's quantity and price, the products total, discount, delivery and grand total.
- Payment: how the buyer paid (QPay, card and so on) shows under the total.
- If an e-barimt was issued, its receipt number and the company TIN or registration number.
- Once the item is delivered, swipe the Mark as delivered row at the bottom of the order.
- Tap Mark in the confirmation. The order moves to Delivered.
- If it was a mistake, tap Undo to move it back to Paid.
Shipped and tracking numbers
If you sent the item by post, cargo or a delivery company, mark it shipped with the Shipment card of the paid order. The order stays Paid and gets a Shipped badge.
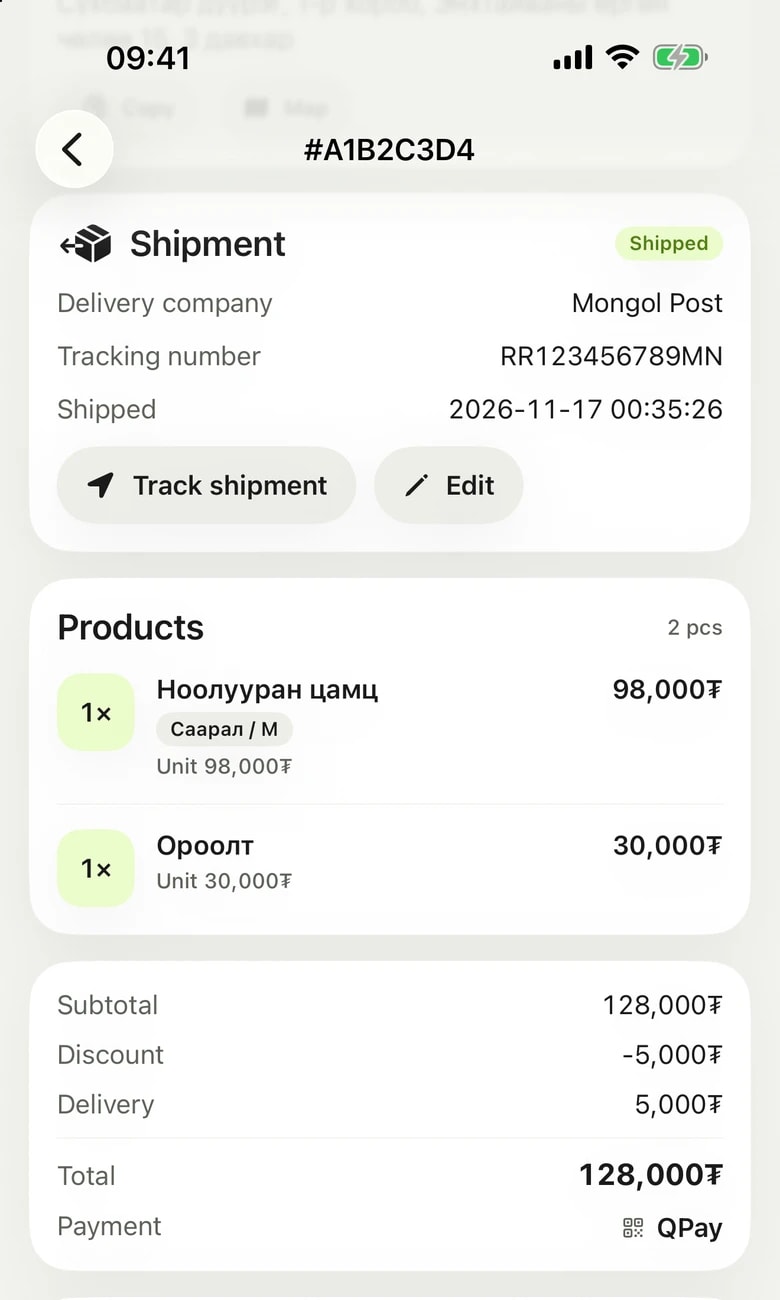
- Tap Mark as shipped on the order's Shipment card.
- Write the delivery company or choose from the options below (Mongol Post, EMS, DHL, Delivered by the shop).
- Enter the tracking number and tracking link if you have them. Both are optional.
- Tap Mark as shipped and confirm. The buyer receives one email with the delivery company and tracking number.
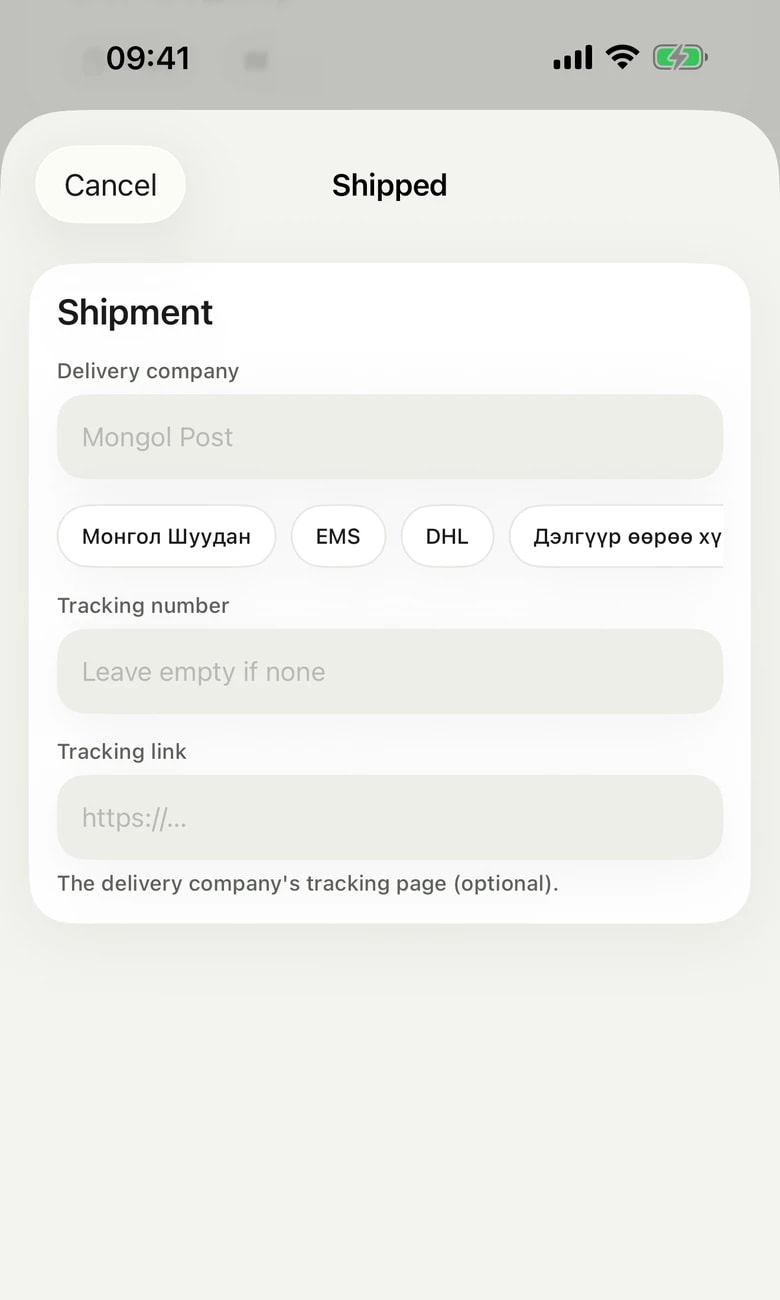
- Update the details with Edit. The buyer does not get another email.
- If you entered a tracking link, open it with Track shipment.
- Once the item is in the buyer's hands, swipe the Mark as delivered row.
Billing an extra charge
Bill an extra charge on a paid or delivered order. For example, when international cargo is charged by weight later.
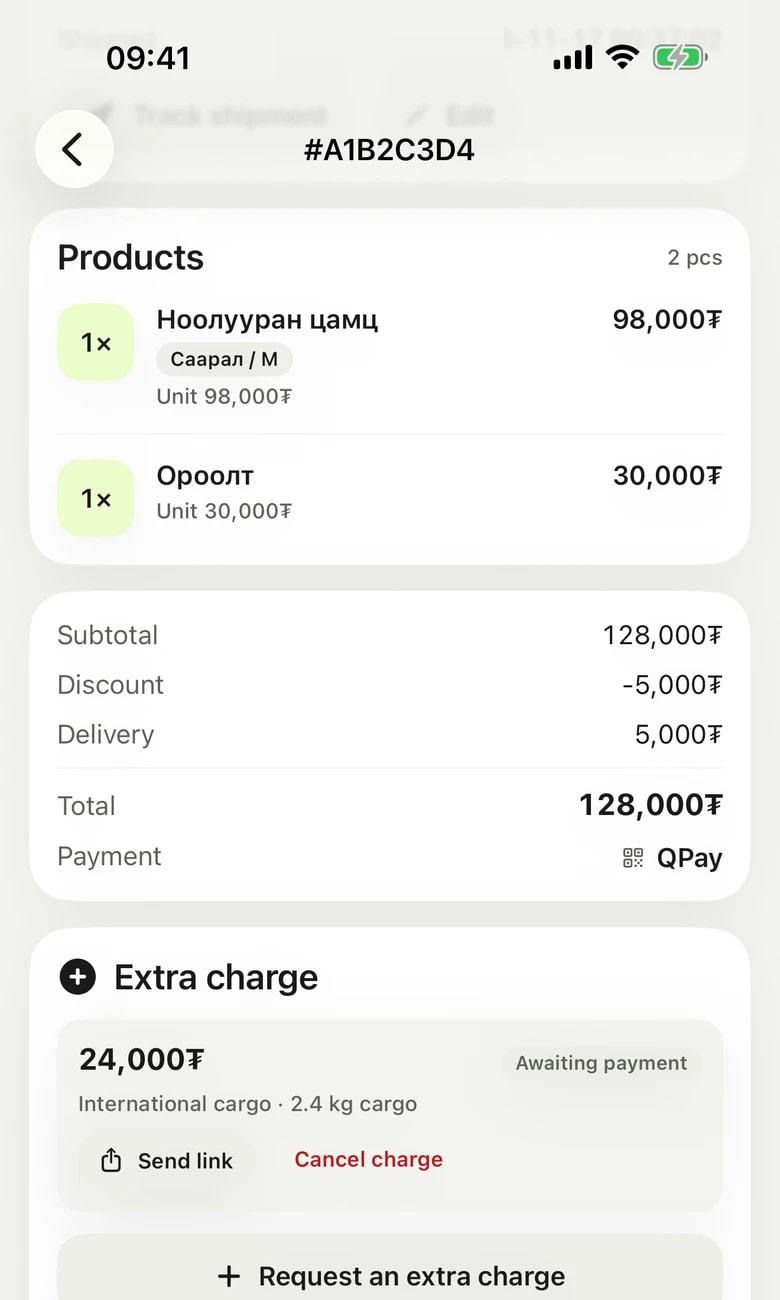
- Tap Bill an extra charge on the order's Extra charge card.
- Enter the amount. The maximum shows under the field.
- Choose a reason and, if you like, write a note (for example 2.4 kg cargo). The note is shown to the buyer.
- Tap Bill and confirm. A payment link is created. If the buyer has an email address, the link is emailed to them.
- You can also send the link yourself by message or chat with Send payment link.
- The order status, stock and original receipt do not change. Every extra charge has its own e-barimt.
- Void an open charge with Cancel. After cancelling, the link can no longer be paid.
- When a charge cannot be billed, the reason is written on the card.
- People without permission to bill extra charges can only view the card.
Adding and editing products
On the Products tab, search by product name and filter by status. To add a new product, tap the add button at the top; to edit one, tap the product. The form is made of several cards; fill in only what you need.
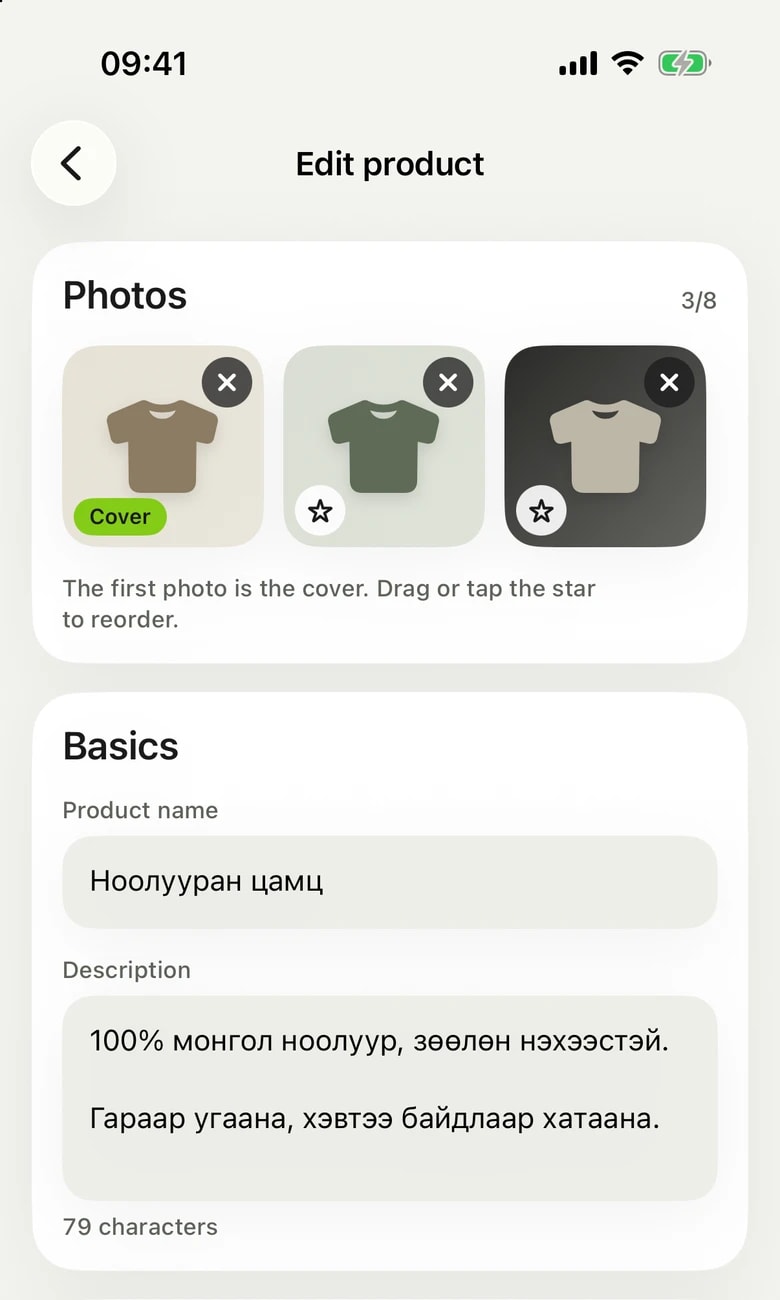
- Photos: tap Add photo and choose up to 8 photos from your phone. Photos are cropped square. The first photo is the cover. Drag, or tap the star, to change the order.
- Basic details: write the product name and description.
- Price and stock: enter the price and stock. Empty stock means it is not tracked; 0 means sold out.
- Sale: choose By percent or By amount. Turn on With end date and choose the day the sale ends. 0 means no sale.
- Category and status: choose the category and brand. If they do not exist yet, add them right there with New category (you can choose a parent category) and New brand.
- Under Status, choose Active (buyers see it) or Draft (hidden from your shop).
- Tap Create product or Save at the bottom and confirm again in the confirmation.
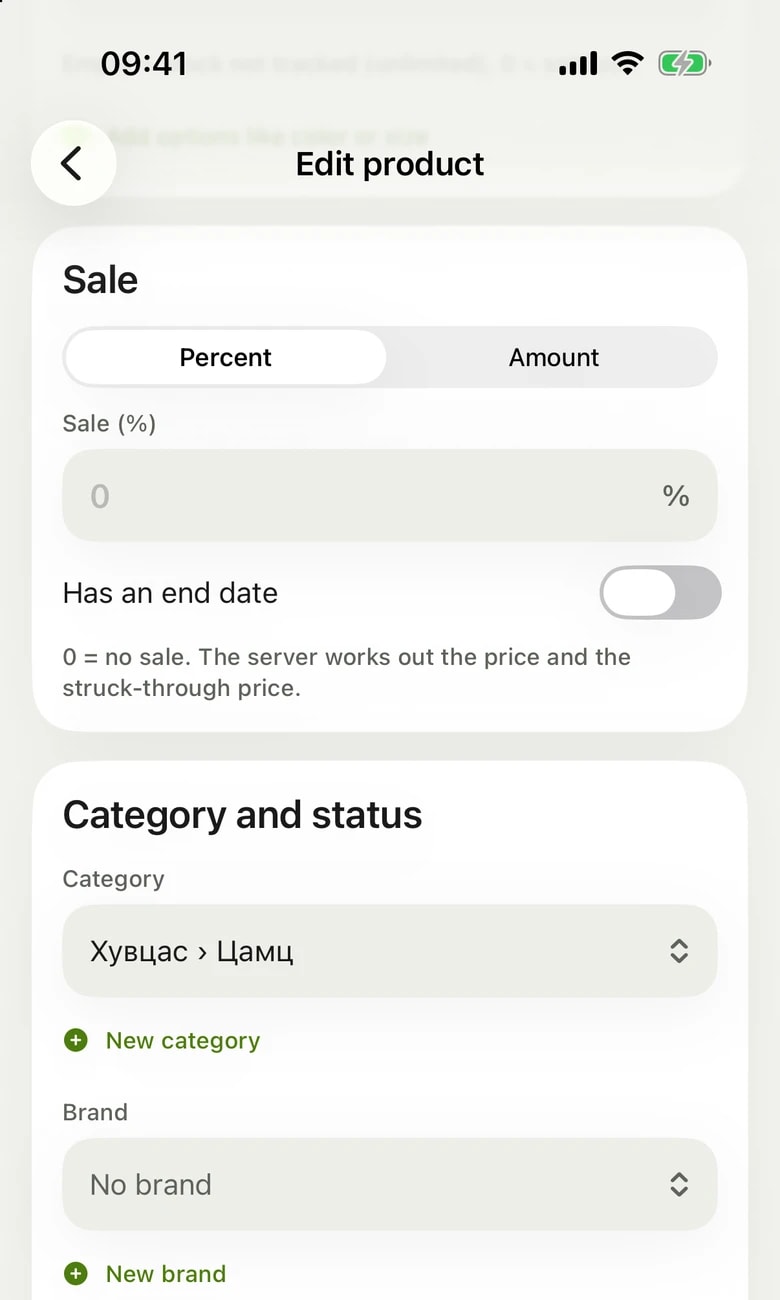
- In the Extras card: with Pre-order on, you take orders even without stock and can write when it arrives. Enter the cargo fee per item. Add up to 20 tags.
- Shops that issue e-barimt get an E-barimt card: barcode (8 to 14 digits), classification code, unit of measure, VAT type and the capital city development tax (2%). Enter a barcode and tap Search to fill empty fields from the national register.
- The no-VAT type (sold abroad) shows only on products already saved with that type. If you are unsure whether a product is VAT-exempt, keep the standard type.
- Publishing needs at least 1 photo, a description of more than 50 characters and a category. If anything is missing, a list shows what.
Options and variants
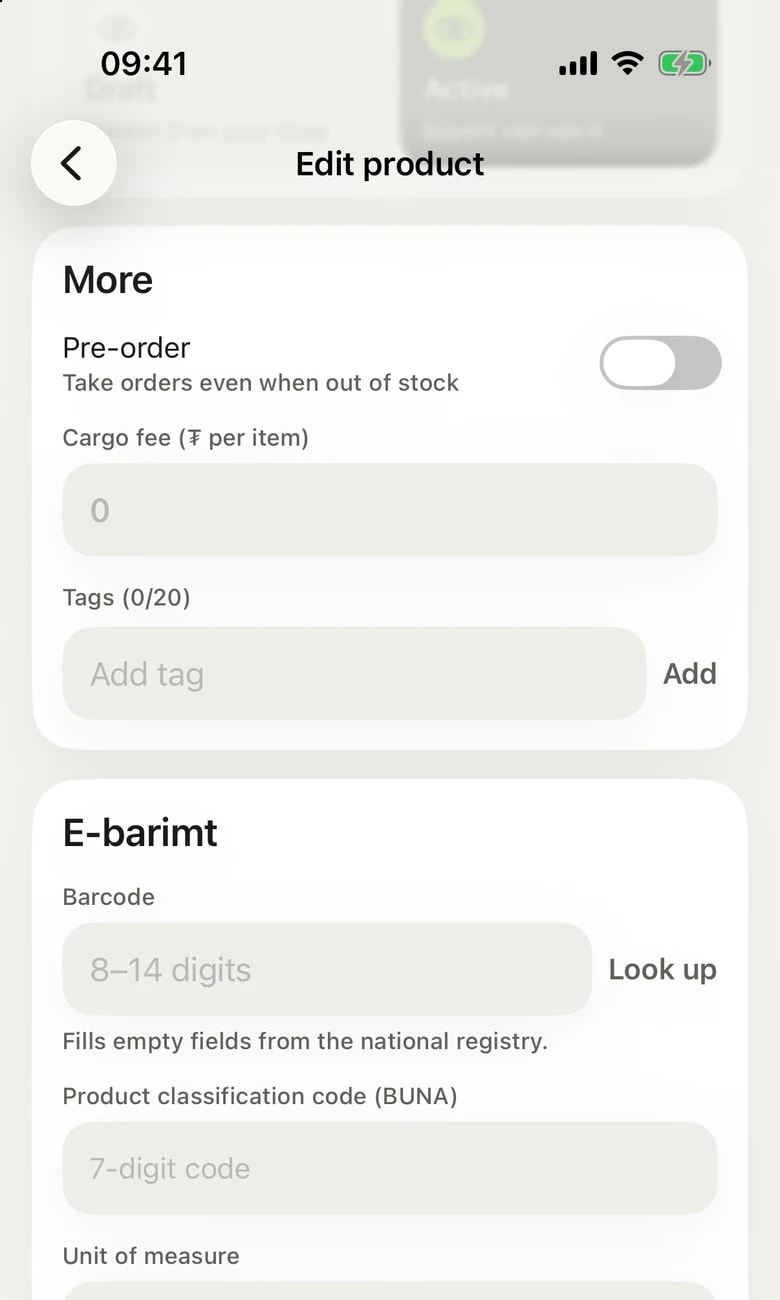
For a product with options such as colour and size, each combination becomes a variant with its own price and stock. Options are added to a saved product: for a new product, create it first, then open it again.
- Tap the Add options such as colour or size row on the product's Price and stock card. For a product with variants, tap Edit options and variants on the Variants card.
- Tap Add option. The first time, you are told that the current price is copied to every variant and stock is entered per variant; tap Continue.
- Write the option name (for example Colour) and add its values (Red, Black). Add several at once separated by commas. Tap Add option and the variants are created.
- Enter each variant's price, stock, SKU and barcode. An empty SKU is created automatically. You can set a variant to For sale or Closed.
- To give all variants the same price and stock, enter them under For all variants and tap Apply.
- Tap Save variants and confirm.
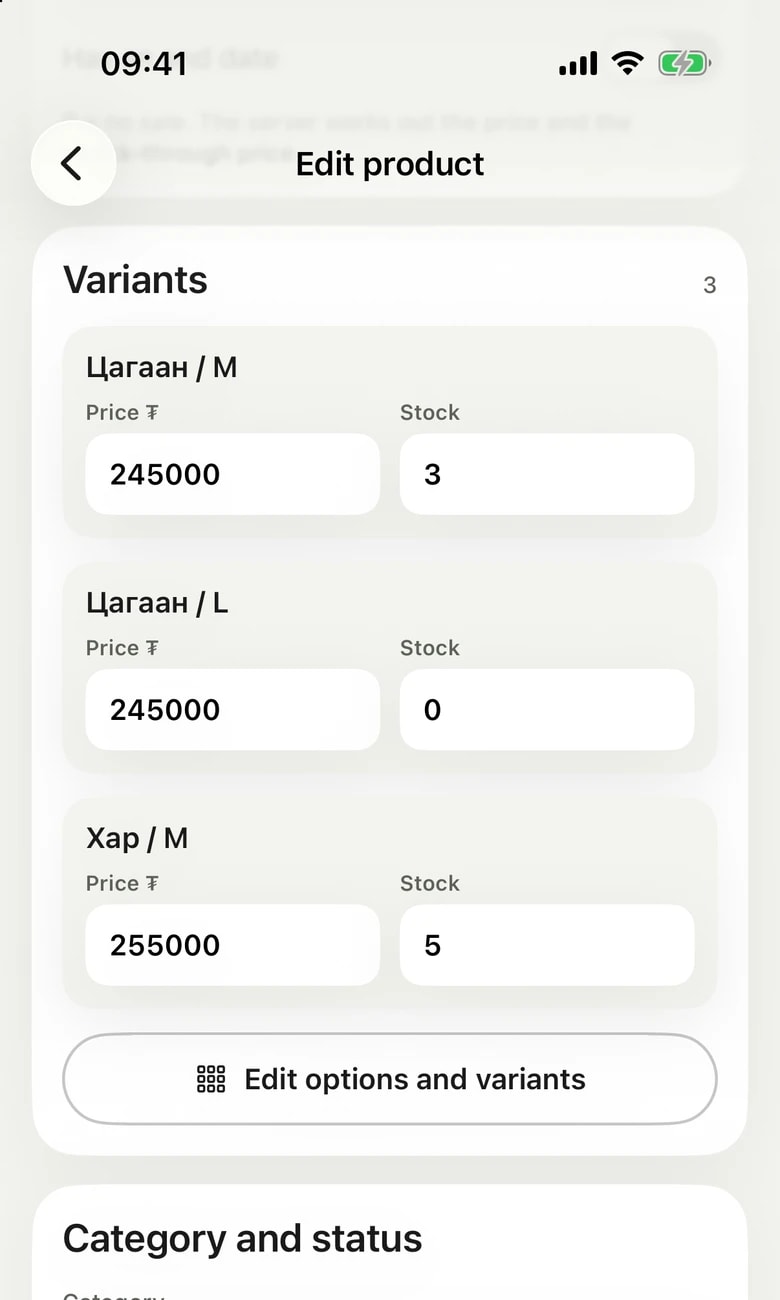
- You can edit each variant's price and stock right on the Variants card of the product page.
- Change an option with Edit and remove it with Delete. Variants with a removed value or option are closed. The last option cannot be deleted.
- If an order changes the stock while you are saving, your value does not overwrite it; the new value is shown. Check it and enter it again.
- Options cannot be edited while the product page has unsaved changes. Save first.
- Edit formatted descriptions, digital product and course files, lessons, and course prices and variants in the web console.
Reports and coupons
The Reports tab shows sales, order count, average, best day, a daily chart and best-selling products. Change the period to 7, 14, 30 or 90 days, or pick dates with Custom range.
The Promotions tab shows active coupons, how many times each was used and the total discount. Copy a coupon code with Copy and send it to your buyers. The new coupon button opens the web console.
Accepting payments and e-barimt
The Payments button on the Home screen, or the Accepting payments row in Shop management, opens the payment settings. Buyers' payments go straight to your account; OpenShop does not pass on money.
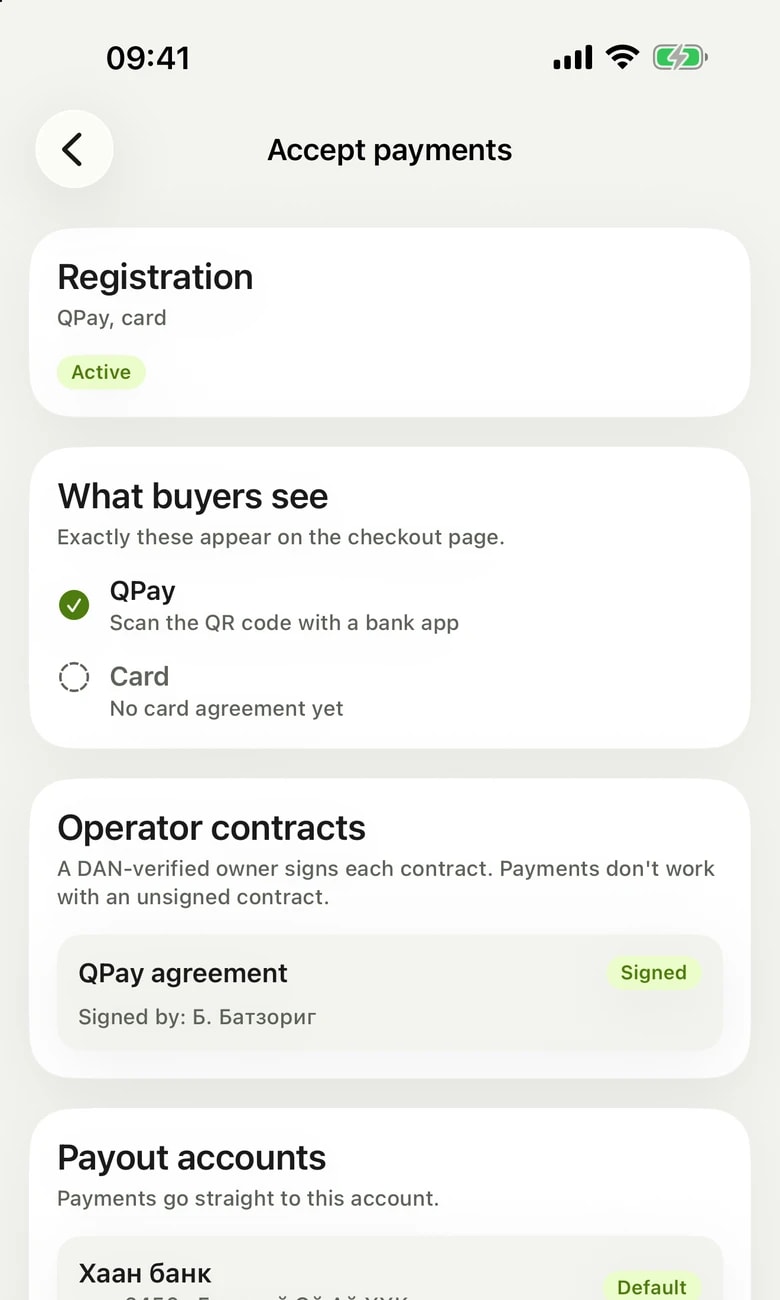
- Registration: the payment registration status and the status of the QPay and card request. If it was declined, the reason shows.
- What buyers see: exactly which payment methods appear on the checkout page, and why any are missing.
- Operator contracts: the status of each contract. Sign an unsigned contract with the Sign button. The DAN-verified owner signs.
- Bank account for income: add an account, make it the main account, connect an account.
- Operators under your own contract (StorePay, Toki, MonPay, Pocket Zero): status and a Check button. Enter or change keys in the web console; the app does not store keys.
- The first time, choose how to start: QPay and card (the one-time registration is filled in the web console) or an operator under your own contract.
The E-barimt page is in the E-barimt group of Shop management.
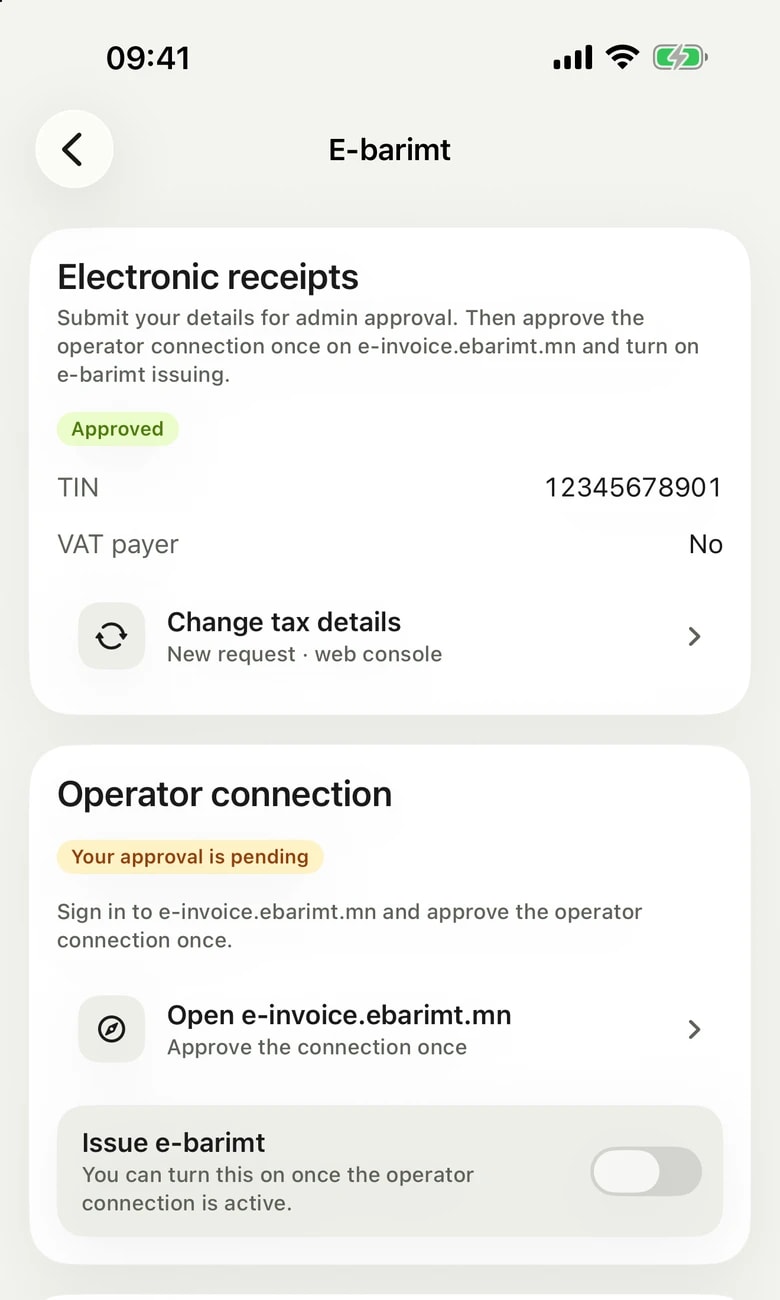
- Request: enter the company's 7-digit register number and tap Search to fill in the TIN. Choose your VAT status, location and activity classification, then tap Request approval.
- While an admin reviews the request, its status shows on the page. If it was declined, read the reason, fix it and tap Send again.
- Once approved, go through the Open e-invoice.ebarimt.mn row in the Operator connection section and approve the connection once.
- As soon as the connection is active, turn on Issue e-barimt. From then on an e-barimt is issued automatically for every payment.
Working in the app as staff
From version 1.4.0, staff can sign in to the app. On the Staff tab of the sign-in screen, they use the username the shop owner gave them and the password they set themselves. With an older version, they are asked to update the app or sign in through the web console.
- The app shows tabs, buttons and pages according to the permissions granted in the owner's Team section. For example, the Staff permission sees orders and products, but not sales figures, Reports or Promotions.
- Pages you can see but not edit show You can only view this, with no Save button. Pages with no permission at all show No access.
- Actions such as marking delivered, shipping, extra charges and editing or deleting products appear only for people with that permission.
- Owner-only actions such as payment registration, contracts, bank accounts and the e-barimt request are locked for other members.
- New paid order notifications also go to staff who can see orders.
- Without permission to see reports, the phone widget shows no sales figures.
Widgets, Control Center, Spotlight
- Touch and hold an empty area of your iPhone's Home Screen and tap the add button.
- Choose the OpenShop Merchant widget.
- Today: today's sales, order count and orders to deliver. Comes in small, medium and large sizes and a Lock Screen version. On the medium size, tap the number of orders to deliver to open the list.
- The large size lists orders to deliver by number and amount, with Deliver and Add product buttons. Buyer names never appear in widgets.
- Setup progress: how many steps are done and what comes next.
- Control Center (iOS 18 or later): you can add Orders to deliver and Add product buttons.
- Touch and hold the app icon for the Orders to deliver and Reports quick actions.
- Search in Spotlight by order number or product name to open the app straight on that page. Orders show only by number, amount and status. Signing out clears the list.
Siri and Shortcuts
Without opening the app, do the following by asking Siri or from the Shortcuts app. Siri phrases follow the app's language (Mongolian, and English from version 1.5); the actions are listed here by what they do.
- Today's sales: OpenShop Merchant tells you today's sales.
- Orders to deliver: OpenShop Merchant lists the orders to deliver.
- Mark as delivered: OpenShop Merchant marks an order delivered. It reads out the order number and amount and marks it only after asking you to confirm.
- Product stock: OpenShop Merchant tells you a product's stock.
- Setup progress: OpenShop Merchant tells you how many steps are left and what the next one is.
- Add product: OpenShop Merchant opens the new product form.
- Shop link: OpenShop Merchant gives you your shop address to share or copy.
- Open reports: OpenShop Merchant opens Reports.
- The Shortcuts app also has Adjust stock (for products without variants, with confirmation), Open order and Open orders to deliver actions.
Appearance: Classic, Glass, dark
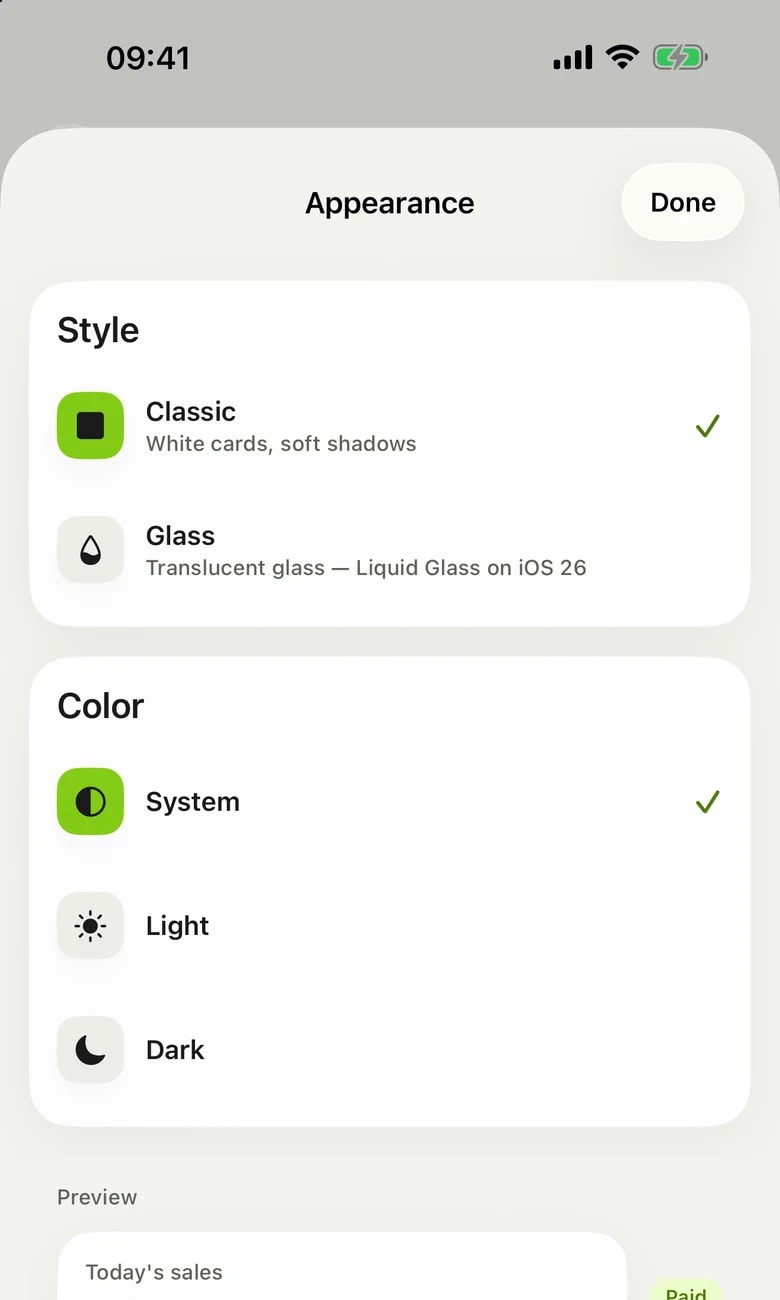
- Tap the shop name on the Home screen.
- Tap the Appearance row in the Settings section.
- Under Style, choose Classic (white cards, soft shadows) or Glass (clear glass, Liquid Glass on iOS 26).
- Under Colour, choose System (follows your iPhone settings), Light or Dark. The Example below shows your choice at once; tap Done to close.
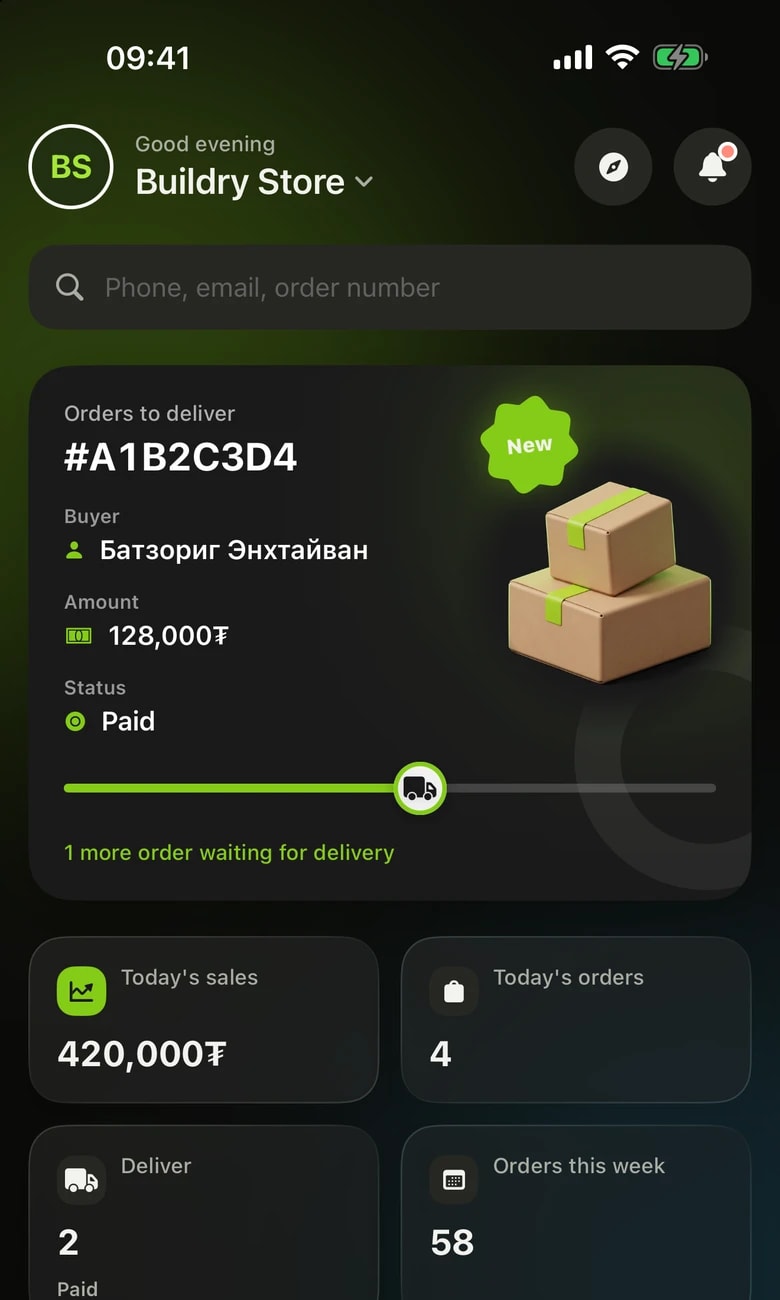
- Your choice is saved only on this phone and does not affect the shop or other members.
- The app's text size follows Settings, Display & Brightness, Text Size on your iPhone.
- If Reduce Transparency is on in your iPhone settings, the Glass style shows in solid colours.
Privacy and the Face ID lock
Tap the shop name on the Home screen and open the Privacy row in the Settings section. There are two options, and you confirm before changing either one.
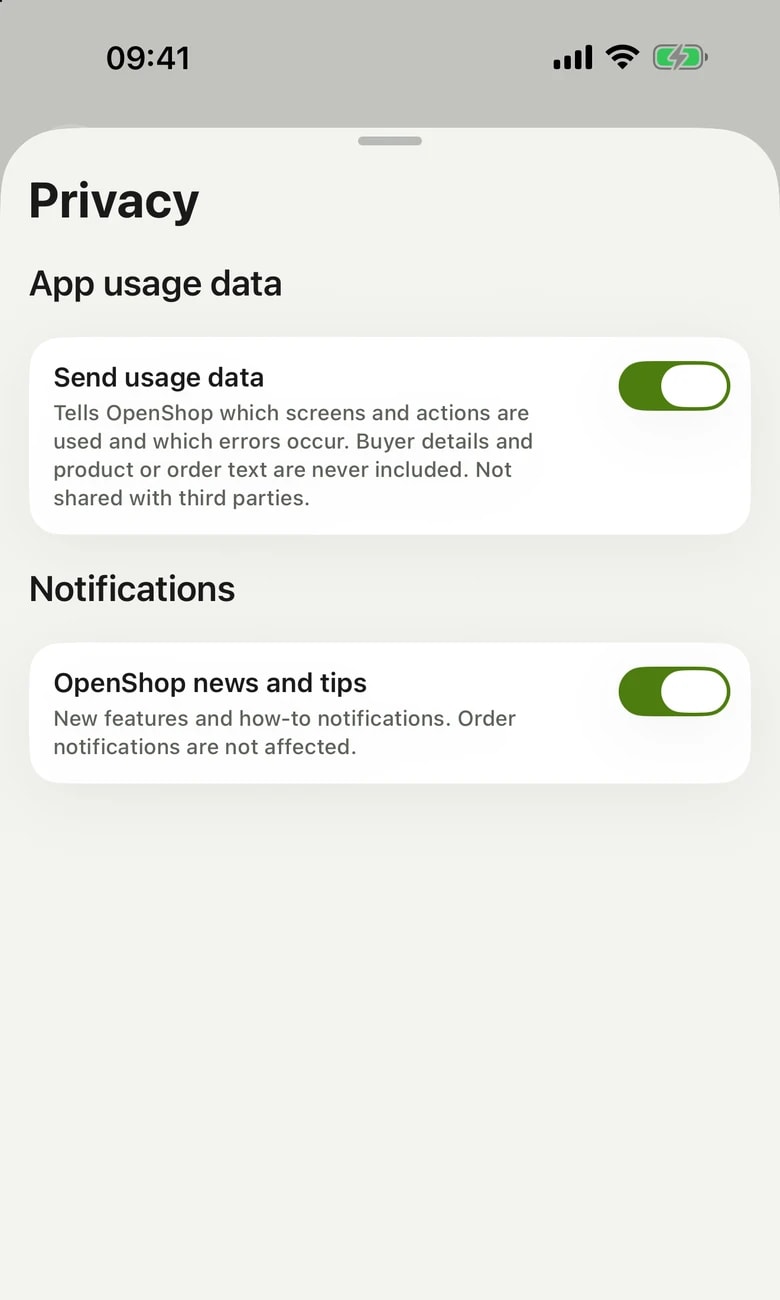
- Send usage data: sends OpenShop which screens and actions are used and which errors occur, to improve the app. Buyer data and product or order text are never included, and nothing is passed to third parties. On by default and applies only to this phone. Turn it off and any data not yet sent is deleted from the phone.
- OpenShop news and tips: notifications about new features and guides. Saved to your account. Even with it off, order notifications keep coming.
Face ID lock: also in the Settings section, tap the Face ID lock row (it shows as Touch ID or passcode depending on your phone), tap Turn on and confirm. While it is on, the app asks you to verify every time it opens.
Menu, account and account deletion
The menu that opens when you tap the shop name on the Home screen:
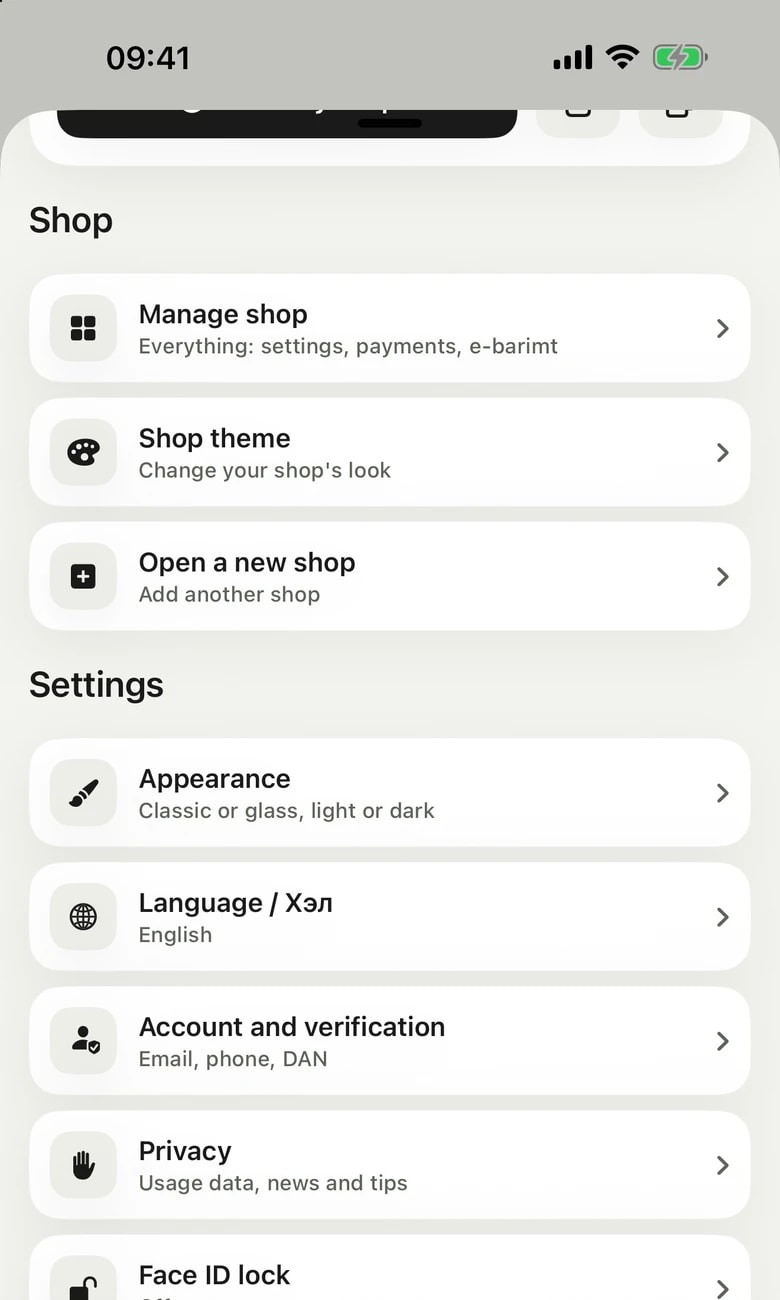
- Switch shop (if you have several) and the shop address: view, share and copy your shop.
- Shop management: every action (see the Shop management section above).
- Shop theme: change how your shop looks. Products, blocks and announcements stay as they are. Shown only to people allowed to edit the shop design.
- Open a new shop.
- Appearance, Account and verification (email, phone, DAN), Privacy and Face ID lock.
- Web console: opens the console inside the app with the same sign-in.
- Sign out and Delete account.
Send a request to have your account deleted with the Delete account row. After OpenShop reviews and approves the request, your name, email, phone and account details are deleted. Financial and tax records are kept anonymously as the law requires. Until it is approved, you can Cancel the request from the same row.
Updating the app
Every time you open the app or come back to it, it checks whether a new version is out.
- The New version available window: tap Update to open the App Store, or Later to close it and keep using the app. It appears only once per version.
- The Please update the app screen: appears when your version no longer works and cannot be closed. Tap Update in the App Store to install the new version. Your shop and orders stay as they are.
- The bottom of this screen shows the version you have installed. If it still appears after updating, tap Check again.