Settings sections
Open Settings in the console's left menu and a list of sections appears on the left (at the top on a phone). Each section has its own Save button. The shop owner or an admin edits settings; staff can only view them.
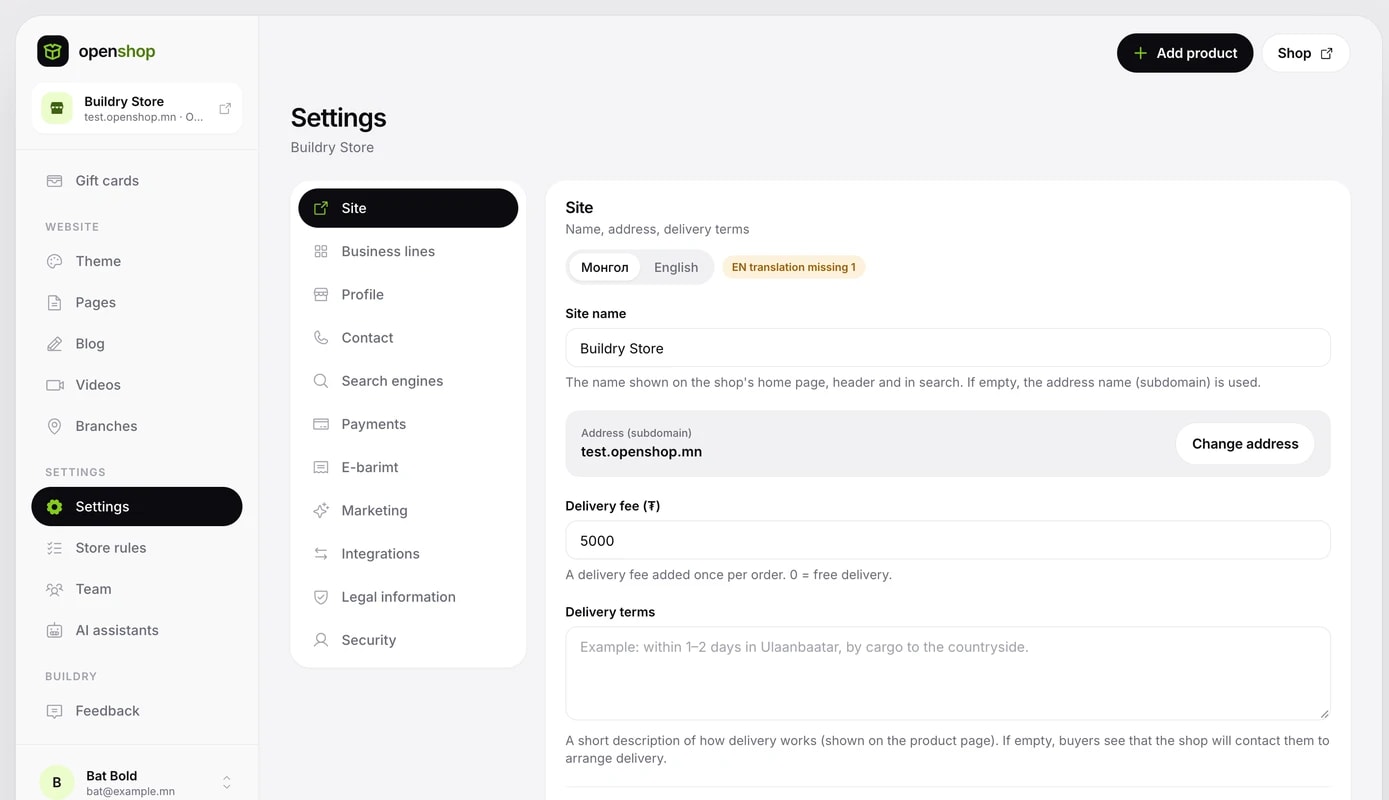
- Site: the site name (if empty, the address name shows), the delivery fee (added once per order), delivery terms, Delivery method (Delivery, Pickup from a branch) and Your own domain. The address (your-shop.openshop.mn) cannot be changed.
- Activities: choose what your shop does. Details in the section below.
- Profile: logo, cover image (banner) and the shop's full description.
- Contact: phone, email, Facebook, Instagram, TikTok, YouTube, address, what3words and opening hours. What you enter shows in the shop header and footer; empty fields are hidden. The Show Facebook Page in footer toggle adds the Page plugin at the bottom.
- Search engines: SEO title, SEO description, social sharing image and favicon. If empty, they come from the shop name, introduction and cover image automatically.
- Payments: connect QPay, cards and the operators you have your own contract with. See the steps at docs.openshop.mn/payments.
- E-barimt: settings for issuing receipts automatically. See the steps at docs.openshop.mn/e-receipt.
- Marketing: unpaid-order reminders, Meta Pixel / Conversions API, Facebook / Instagram catalog. The Pixel guide is at docs.openshop.mn/meta-pixel.
- Integrations: API keys, webhooks, apps and product feeds. See the AI assistants and integrations page.
- Legal details: whose name the shop runs under, and the Merchant agreement.
- Security: two-step verification for your sign-in.
Turning activities on and off
Of the five activities (Online shop; E-books and files; Video courses; Bookings; Events and tickets), turn on the ones your shop needs. Each one you turn on appears in the console menu.
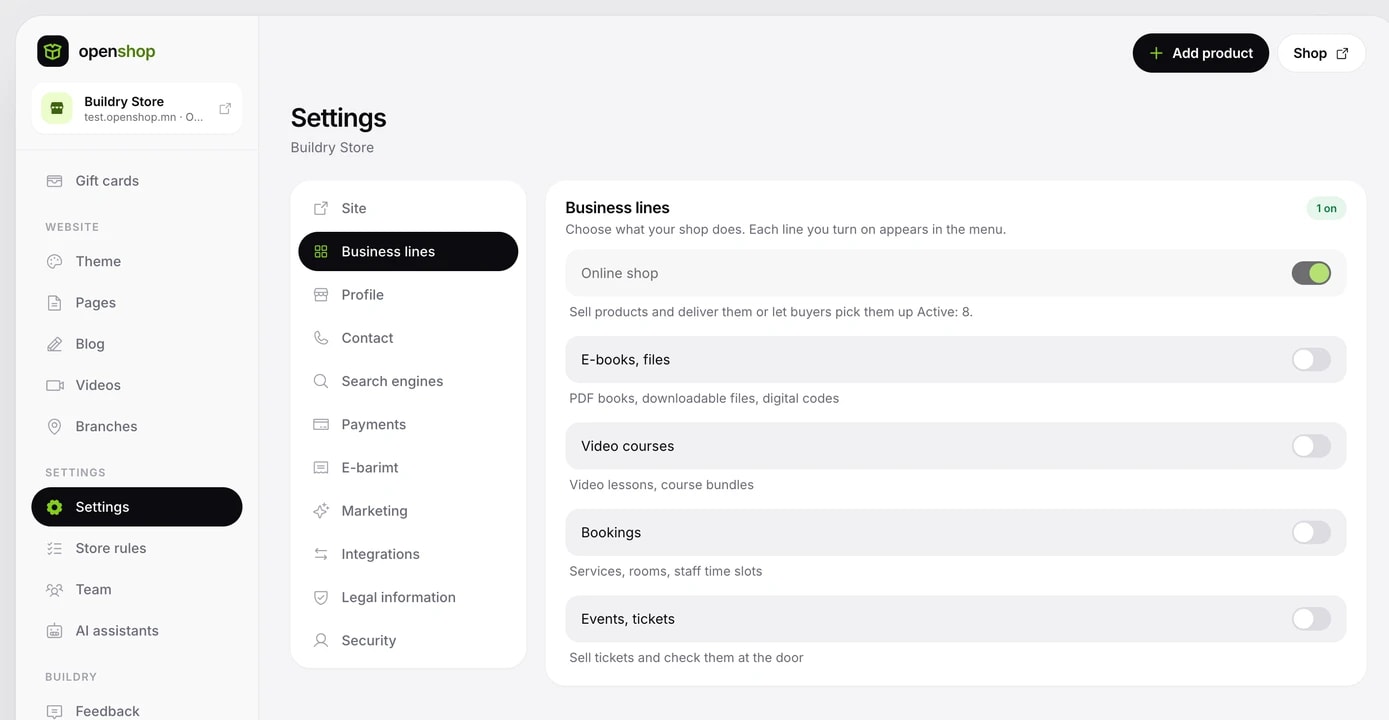
- Open Settings, Activities.
- Turn on the activity you need and click Turn on in the confirmation. A new section appears in the menu, where you can create new things.
- To turn off one you no longer need, click Turn off. It is hidden from the menu, but earlier orders and shop pages stay as they are.
- At least one activity must be on.
- An activity that still has active items (published products, booking resources, upcoming events) cannot be turned off. Their number shows under the toggle as N active. Archive them first and try again.
- Activities are changed by the owner or an admin.
Team: adding staff
The Team page in the Settings menu has three tabs: Staff, Members and Permissions. A staff account signs in with a username and password created by the shop owner.
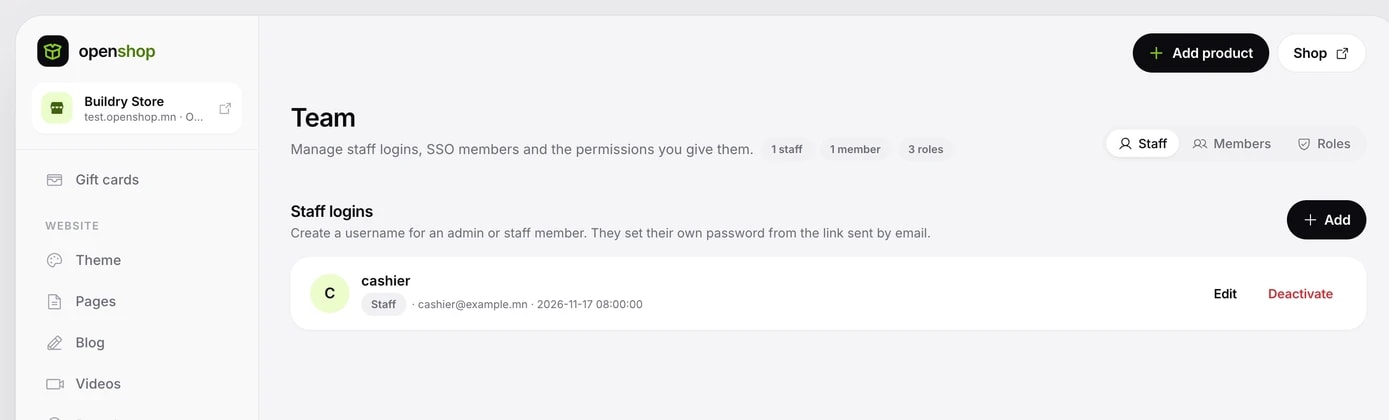
- On Team, Staff, click Add.
- Write a username and choose a Permission: Staff (view only) or Admin (can edit).
- Enter the staff member's email and click Create. A link to set a password is sent to that address and is valid for 24 hours.
- The staff member sets their own password through the link. The owner never sets or knows a staff password.
- Staff open your-shop.admin.openshop.mn and sign in under Staff on the sign-in page with their username or email and password.
- In the OpenShop Merchant iOS app (from version 1.4.0), staff sign in with the same username and password and work within their permissions.
- Edit: change the staff member's email.
- Send password reset link: a new link valid for 2 hours is sent. The earlier link stops working, and the current password works until the staff member sets a new one.
- Deactivate: blocks the staff member's sign-in. You can Reactivate it.
- Staff change their own password with Change password in the account menu at the bottom of the console. A password has at least 8 characters.
Permissions and members
Besides the system permissions Owner, Admin and Staff, you can create your own permission types. For example, a Cashier who only fulfils orders.
- On Team, Permissions, click New permission.
- Write a name. Choose an existing permission in Copy from to start from its rights, or start from scratch.
- Tick the rights to grant in each group and click Save.
- On the Members tab, choose a permission in the list for each member who signs in with Google or DAN, and click Save.
You can only grant rights you have yourself. Creating, editing or deleting permissions and adding staff require a recent sign-in, so you are sometimes asked to verify again.
Two-step verification
Once it is on, every sign-in asks for a 6-digit code from an app on your phone after your password or email code. Even if your sign-in email or Google account is compromised, nobody without the code can get into your shop.
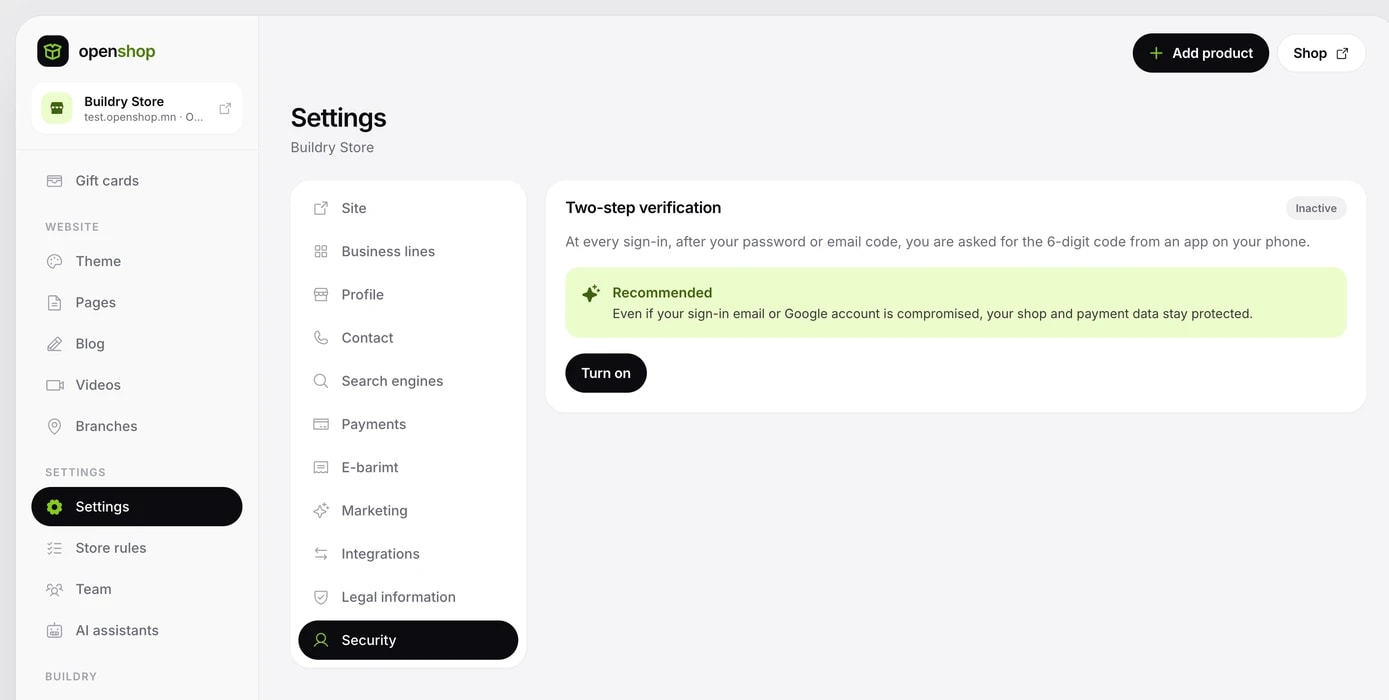
- Open Settings, Security, click Turn on, then Turn on again in the confirmation.
- Open Google Authenticator, Microsoft Authenticator or a similar app on your phone.
- Scan the QR code on the screen. If you cannot scan it, click Copy key and enter it in the app by hand.
- Type the 6-digit code shown in the app and click Verify.
- 10 recovery codes appear. Click Copy or Download and keep them somewhere safe. Tick that you have stored the codes safely and click Finish.
- Turning it on signs you out on other devices, and they ask for a code when you sign in again.
- If you lose your phone, sign in with a recovery code. Each code works once and is not shown again.
- Click Regenerate recovery codes and all the old codes stop working and 10 new ones appear. A warning shows when only a few are left.
- Turning it off or regenerating codes asks for a code from the app or a recovery code.
When you sign in from a new device or browser, a notice goes to your email. It names the device type (for example Chrome, macOS) and an approximate location, never the IP address. Turning two-step verification on or off and changing your phone number also send an email. If it was not you, contact us right away.
Passkeys and signed-in devices
A passkey lets you sign in with your phone's or computer's fingerprint, face or PIN instead of typing a password or code. The Sign-ins and devices page shows your passkeys and everywhere your account is signed in.
- In a browser where you signed in with Google or an email code, open id.openshop.mn/security.
- In the Passkeys section, click Add a passkey and confirm with your phone's or computer's fingerprint, face or PIN.
- Next time, click Sign in with a passkey on the sign-in page.
- Add up to 10 passkeys to one account. Each row has Rename and Remove. Removing a passkey means it can no longer be used to sign in, and every device except this browser is signed out.
- With two-step verification on, signing in with a passkey still asks for the code from your app. A passkey does not replace the code.
- Staff accounts cannot use passkeys.
- Signed-in devices: each device shows its browser, approximate location, sign-in method and when it was last active. If you do not recognise one, click Sign out.
- Sign out of all other devices: signs out every browser except this one, the OpenShop Merchant app and connected apps.
- Connected apps: disconnect apps signed in with your account with the Disconnect button.
- These actions need a sign-in within the last 5 minutes. Otherwise a Confirm it is you window appears.
Legal entity and contract
In Settings, Legal details, you set whose name the shop runs under. This is the party to the Merchant agreement and it shows on your shop's pages. The owner and admins can see this section; only the owner can change it.
- Individual: your DAN-verified name shows with a masked registration number. If you are not DAN-verified yet, click Verify with DAN first.
- Company: the company name from the state register shows with a masked register number.
- To switch to a company, click the Company option.
- In Connect a company, write the 7-digit company register number and click Verify with DAN.
- Sign in with DAN again. Only the citizen who first verified your account, and who is a founder or manager of that company, can connect it.
- When you come back, the company appears in the list. Click Use this company to confirm.
The Merchant agreement section shows the current version and the date you accepted it. When a new version is published, the changes are highlighted. The owner reads it and clicks Accept agreement. If the party's name changes (for example switching from individual to company), the agreement is accepted again under the new name.
- If the acceptance deadline passes, publishing new products is blocked. Shop pages, orders and payments keep working normally.
- The Acceptance history records who accepted the agreement, under which name and when. This record cannot be changed or deleted.
Feedback
To report a bug, make a suggestion or ask a question, use Feedback in the Buildry section of the console menu. Staff can send feedback too.
- On the Feedback page, click New request.
- Choose a type (Bug, Suggestion, Question, Other) and write a Title.
- Describe what happened under Details. For a bug, write how to reproduce it; a screenshot gets it fixed faster. Click Send.
- Open your request from the My requests list to read and write replies.
Requests are Open, In progress, Answered or Closed. You can rate the answer to an answered or closed request from 1 to 5 stars.
Requesting account deletion
To have your account deleted permanently, send a request. After OpenShop reviews and approves it, your name, email, phone and account details are deleted. Deletion cannot be undone.
- Sign in to app.openshop.mn and open Profile.
- In the Delete account section, write a reason if you like (optional).
- Click Send deletion request, then Send request in the confirmation.
- While the request is under review, you can withdraw it with Cancel request. Once approved, the account is deleted and you are signed out.